Suunto Ambit Series watches are one of the most sophisticated GPS watches on the market. Since 2012 Suunto has released 7 different Suunto Ambit watches. All these watches have one thing in common – a powerful GPS receiver that provides you with accurate navigation. Therefore, they are perfect for hikers, mountaineers, climbers and other outdoor enthusiasts. Suunto Ambit watches are also equipped with altimeter, thermometer, compass, barometer (except Run and Sport models) and many other useful features. The latest watch from Suunto Ambit Series is the Suunto Ambit 3 watch which has been released in 2014. It has also been listed in our review of the best hiking watches. The Suunto Ambit 3 watch is the first watch from Suunto that is equipped with Bluetooth. This allows you to pair the watch with a Smartphone and therefore you can see phone notifications such as incoming calls, missed calls and messages directly on the watch. The watch can be also paired with other Bluetooth-ready devices.
So, now that we know what Suunto Ambit watch offers, it’s time to look deeper into its navigation functionality. In this guide I will explain how to use the Suunto Ambit watch for navigation. This guide is based on Suunto Ambit 2 watch but will work with other Ambit watches as well.
Note: Suunto Traverse watches have identical navigation functionality as the Ambit watches. Therefore, this guide can also be used for Suunto Traverse watches.
I have been using Suunto Ambit 2 watch for over a year now and I must admit that the navigation feature comes in handy in various situations – from hiking to sightseeing.

Suunto Ambit Navigation
This guide explains:
- How to use the watch together with a map for navigation
- How to create a route and how to upload it to the watch
- How to navigate through unknown terrain with the watch
How to use the watch together with a map for navigation
Suunto Ambit watches do not show map on the screen. If you create a route and upload it to the watch, the watch will show you pointy directions where to go. If you haven’t uploaded the route you can still use the watch together with a regular map for navigation. The watch will show coordinates of your current location. Therefore, you can also easily find your location on the map.
Set up the watch
The Suunto Ambit watches support different coordinate systems. Most commonly used coordinate systems that are supported by the watch are UTM and MGRS. You should set the watch to the same coordinate system like your map uses.
My Suunto Ambit 2 watch is set to MGRS coordinate system because most of my maps use this coordinate system.
To change the coordinate system of the watch follow the steps below:
- Hold “Next” button for 3 seconds
- Select General and confirm by pressing the “Next” button
- Select Formats and confirm by pressing the “Next” button
- Select Position Format and confirm by pressing the “Next” button
- Select the desired coordinate system
I have selected the MGRS coordinate system.
Find your location
Now let’s get your location.
To get your current location follow the steps below:
- Press “Start/Stop” button
- Select navigation and confirm by pressing the “Next” button
- Select location and confirm by pressing the “Next” button
- Wait for the GPS signal
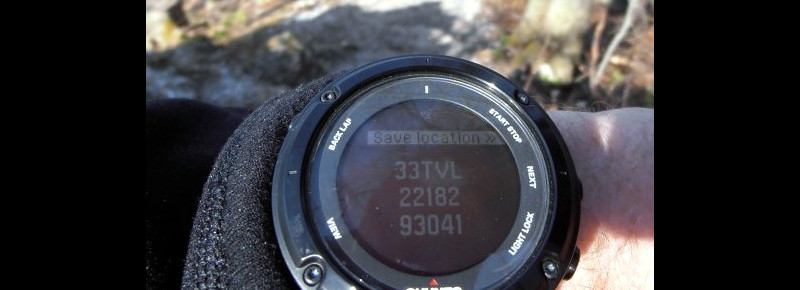
The watch displays location as shown on the image below.
Location – Suunto Ambit 2
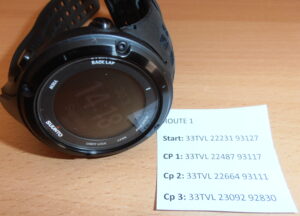
So, now you are probably wondering what these numbers mean. Let’s explain:
33 – grid zone designator
TVL – the 100,000 meter square identifier
22182 – numerical location, easting is 22182
93041 – numerical location, northing is 93041
With coordinates of your current location it’s easy to find your location on the map. I won’t describe how to do this because the video below will give you all the required information.

How to create a route and how to upload it to the watch
To create a route you will need:
- Suunto Ambit (or Traverse) Series Watch
- Computer
- MovesCount Application
- Suunto Ambit Series USB cable
Creating and uploading a route is easy and fast. When the route is uploaded, the watch shows you pointy directions where to go. I usually create a route before going on a hike where navigation might be tricky.
Creating a tour
- Visit http://www.movescount.com and log in. If you don’t have an account sign up first.
- Click Plan & Create and select Route Planner
- Click Create Route
- Click on the map to create waypoints (the watch will navigate you to these waypoints).
- Click close route (left bottom corner)
- Click save route
- Connect the watch to your computer via USB cable and the route will be automatically uploaded to the watch
The route is now uploaded to the watch and you are ready to navigate your way through unknown terrain.
Enabling navigation on the watch
- Press the “Start/Stop” button
- Select Navigation and confirm by pressing the “Next” button
- Select Routes and confirm by pressing the “Next” button
- Select the route you have created and confirm by pressing the “Next” button
- Select the first waypoint and confirm by pressing the “Next” button
- Select Navigate and confirm by pressing the “Next” button
- Wait for the GPS signal
Now the watch will locate the first waypoint and show the pointy direction marker with the distance towards it. When you’ll approach the first waypoint, the watch will start navigating towards the second waypoint.
Note: The watch can also display the route as a line – your location (triangle) is shown in relation to the route.
How to navigate through unknown terrain with the watch
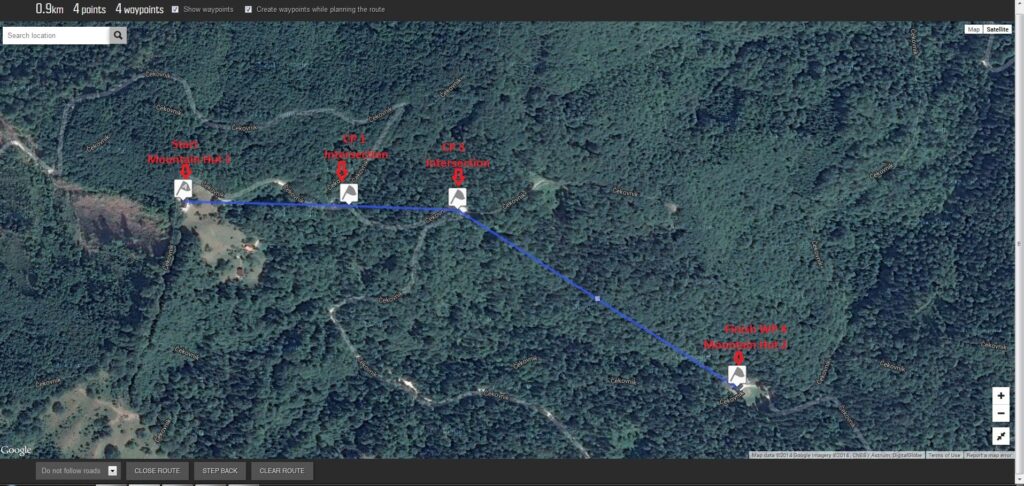
Here I will describe how I used the Suunto Ambit 2 watch for navigation on one of my hikes. My intention was to hike from the Mountain Hut 1 to the Mountain Hut 2, partly on the road and partly through the woods. First I inserted the waypoints in the Suunto Movescount app. I recommend making waypoints at significant places like intersections, buildings, glades etc. This allows you to check how accurate the navigation is and if everything works properly.
Here are my waypoints:
- Waypoint – Mountain Hut 1 – Start
- Waypoint – CP 1 – Intersection
- Waypoint – CP 3 – Intersection
- Waypoint – Finish WP 4 – Mountain Hut 2
As the names of the waypoints are slightly confusing, see the image below for better understanding.
Getting to the waypoints
Waypoint – Mountain Hut 1 – Start
I reached the Mountain Hut 1 without a problem as I was familiar with the trail to it. However, I had navigation feature enabled to see that everything works well.
Waypoint – CP 1 – Intersection
I hiked on the road from Mountain Hut 1 to CP 1. The watch detects the waypoint and starts navigating towards CP 3.
Waypoint – CP 3 – Intersection
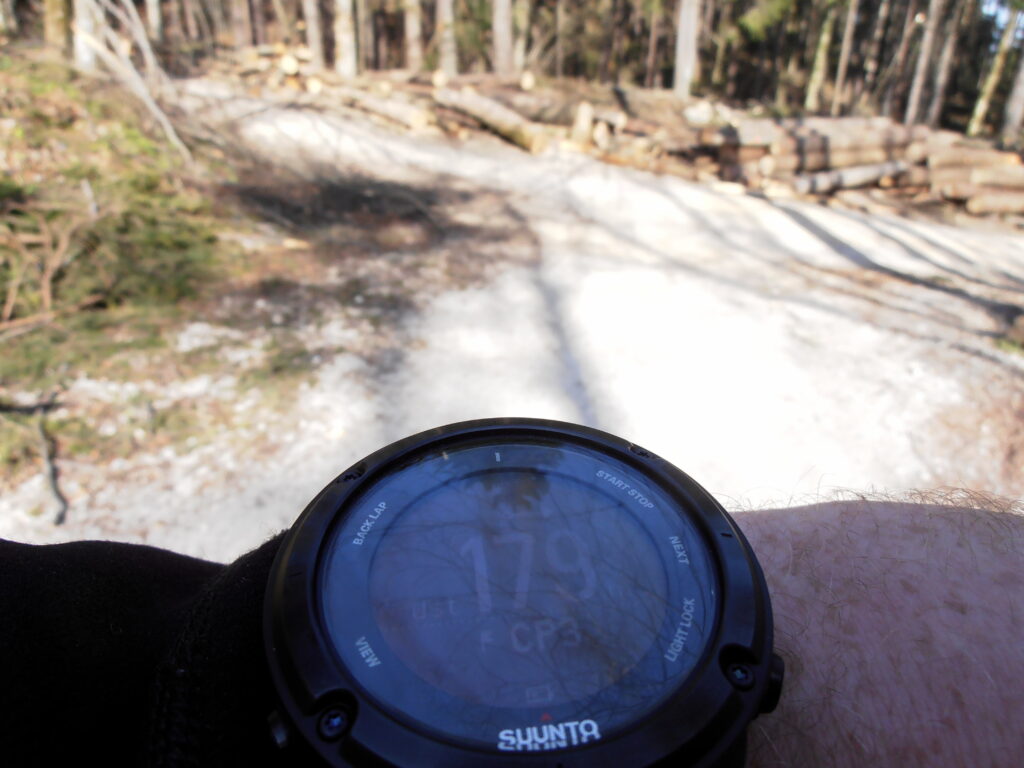
I continued towards CP 3. Still hiking on the road. The video below shows how I reached CP 3.

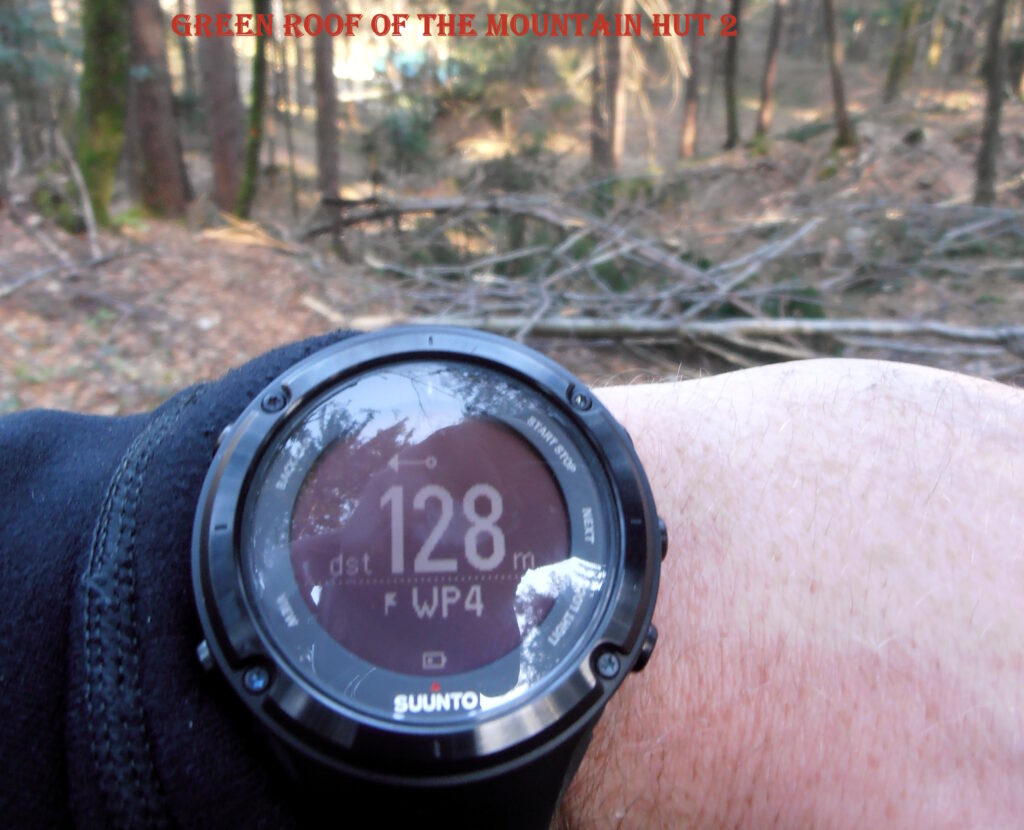
Waypoint – Finish WP 4 – Mountain Hut 2
Green roof of the Mountain Hut 2 is seen on the image.
Finishing the hike
Conclusion
Navigation with Suunto Ambit watch is easy and simple. The watch is equipped with a powerful GPS receiver that offers incredible accuracy. Therefore, Suunto Ambit watch is perfect for hikers, mountaineers, climbers and other outdoor enthusiasts. I recommend the Suunto Ambit watch to everybody who wants a reliable GPS watch for various outdoor adventures.
What I like the most about Suunto Ambit:
- Robust design
- Accurate GPS receiver
- Navigation and tracking at the same time
- Easy to create tours
- Detailed analytics in Movescount app
Where to buy?
Also available at:
