Outdoor adventures can be hard on your gear, as both cliffs and vegetation expose it to abrasion and tears. We always recommend that you repair your current gear and apparel rather than buying new products incessantly. We have previously made articles about how to repair holes and tears in Merino clothing and how you can re-waterproof your rainwear with a DWR-spray. In this article we will write about how you can repair the tears that might occur on down jackets, other insulated jackets and sleeping bags. The common factor is that the outer synthetic fabric is very thin and lightweight – which makes it all the more susceptible to tears. Tears can of course also occur inside your jacket, i.e. in the lining, especially if you have been carrying accessories with sharp edges in an internal pocket. Tears inside the lining can be repaired the same way as the external ones, but it matters less how good it looks as only few are likely to see it. We will describe the following methods to repair a down jacket, as well as rate them with regards to level of difficulty, durability and style (how good it looks):
- Repair the Tear with Duct Tape
- Repair the Tear with an External Patch
- Repair the Tear with an Internal Patch
- Repair the Tear with Needle and Thread
Repair the Tear with Duct Tape
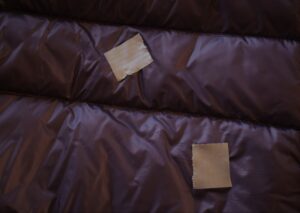
How to Repair a Down Jacket – patching up a tear with duct tape is neither a pretty nor permanent solution
- Level of difficulty*
- Level of durability **
- Level of style *
While it is good to repair any tears in your down jacket as soon as possible to prevent the insulation from escaping and the tear from potentially widening, you should avoid this method if you can. Patching your down jacket up with duct tape might seem like a quick and cheap method, but the duct tape will disintegrate with washing (or even just a quick rain shower, all depending) and can leave a lot of sticky residue. This can then be a problem when you try out a more permanent solution. Furthermore, duct tape looks as cheap as it is. We only recommend this method for emergency situations, where you are losing insulation or the tear seems to be spreading.
Repair the Tear with an External Patch
- Level of difficulty**
- Level of durability ****
- Level of style **(clear patch)-****(colored patch)
The easiest way to repair a tear properly is to apply a patch of appropriate gear repair tape like Tenacious Tape from GearAid, StormSure etc. to the outside of the garment where the tear is located. The surface should be clean and dry, and any fleeing insulation should be tucked neatly into the hole (you can use tweezers). If the surface is dirty, it is best to clean it with pure water or rubbing alcohol on a clean sponge or piece of fabric. Avoid using soap as any residue can affect the adhesiveness of the gear tape. You should, however, always follow the instructions on the brand-specific gear tape you are intending to use. Many brands offer transparent tapes or patches, as they will function regardless of the color of the jacket.
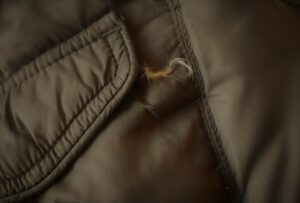
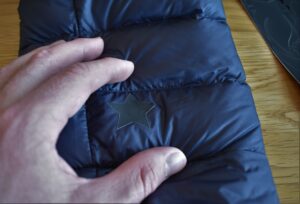
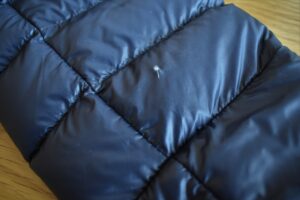
Yet, in our opinion, a colored patch or piece of gear tape looks much better – especially if you can match it to one of the colors on the jacket (e.g. fabric, zipper, pull loops, seams, elastic cuffs etc.). You can get rolls of Tenacious Tape in the colors bright red, yellow, blue and olive green besides black and white. The brands also offers pre-made round or rounded rectangular patches as well as in a small kit with multiple shapes such as stars, leaves, animals etc. The pre-made patches provide a cleaner look to the repair than those you cut out yourself, but are only available in black. To repair a tear on the sleeve of Blaz’s Dark Peak Nessh down jacket, we chose to buy the Tenacious Tape kit with various shapes, which we will also use for repairs in the future. On the picture below you can see how hole on the sleeve of the down jacket looked before getting patched up with a black star-shaped patch.
Repair the Tear with an Internal Patch
- Level of difficulty****
- Level of durability ****
- Level of style ***
A less easy way to repair the tear in your down jacket is to attach the patch to the inside of the tear, i.e. between the insulation and the tear in the fabric. Here, it matters less whether the patch is clear or colored, but more that the patch is exactly the right size and shape. So, if you prefer this method, it might make sense to purchase a roll or sheet of gear repair tape that you can cut your own patches out of. You should, however, make sure that the shape you cut out has rounded edges to make sure that there are no sharp corners which could poke at the fabric and create other holes or weaknesses.
The method requires a pair of tweezers and a bit of dexterity, as you have to maneuver the patch into the hole with the sticky side facing up toward you, and then make sure that it lies nice and flat, and that the sides of the tear come nicely together (see more in video below). If there is fabric missing, meaning that the sides of the tear can’t come nicely together, then you should maybe choose a colored tape rather than clear where the (white) insulation will be seen through. Regardless, you should always follow the instructions on the brand-specific package.
Video Guide – How to Repair

Repair the Tear with Needle and Thread
- Level of difficulty*****
- Level of durability ***** (depending on tear and your skills)
- Level of style *****
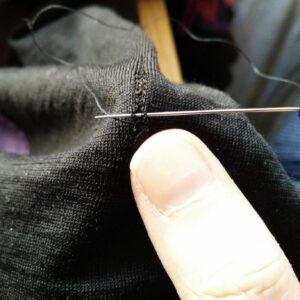
The last and very old-school method of repairing your down jacket is by stitching the tear up with needle and thread. This is not as easy and forgiving a material as stretchy Merino wool fabrics, which are knitted and thus naturally have tiny holes between the interlockings of the threads. When you sew in the fabric of a down jacket, you create irreversible holes so you should be quite sure of your (hand) sewing skills before you start out. To make the holes as tiny as possible you should use the finest needle possible, and a strong but fine thread (standard sewing thread will do). The thread should be matched as closely to the color of the fabric as possible to ensure the sleekest look.
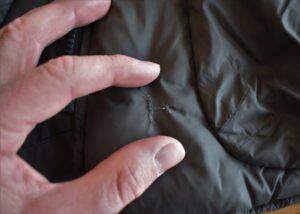
As you sew, you should make sure that your stitches are narrow, straight and small to make the repair look as neat as possible. It is not easy if you, like me, aim to only stitch the tear together without stitching through the entire jacket, i.e. face fabric, insulation AND lining. This is to avoid the creation of a cold spot where the tear is mended (if you don’t know what a cold spot is, you can look it up in our Outdoor Clothing Glossary). The knots should be equally small, but tight and strong to make sure the repair will last. On the images you can see the results of me repairing multiple tears on a ten years old down jacket – repairs which I made several years ago, and which still last. Close-up they might not look the best, but overall the repairs are discrete enough to wear the jacket out and about in town.
