The Sea to Summit Telos TR3 is an exceptionally spacious and versatile ultralight backpacking tent that excels in ventilation, livability, and smart functionality. Its innovative Tension Ridge design, multiple setup modes, and thoughtful storage solutions make it one of the most comfortable lightweight tents for backpacking and family camping, although the thin floor fabric benefits from an additional footprint.
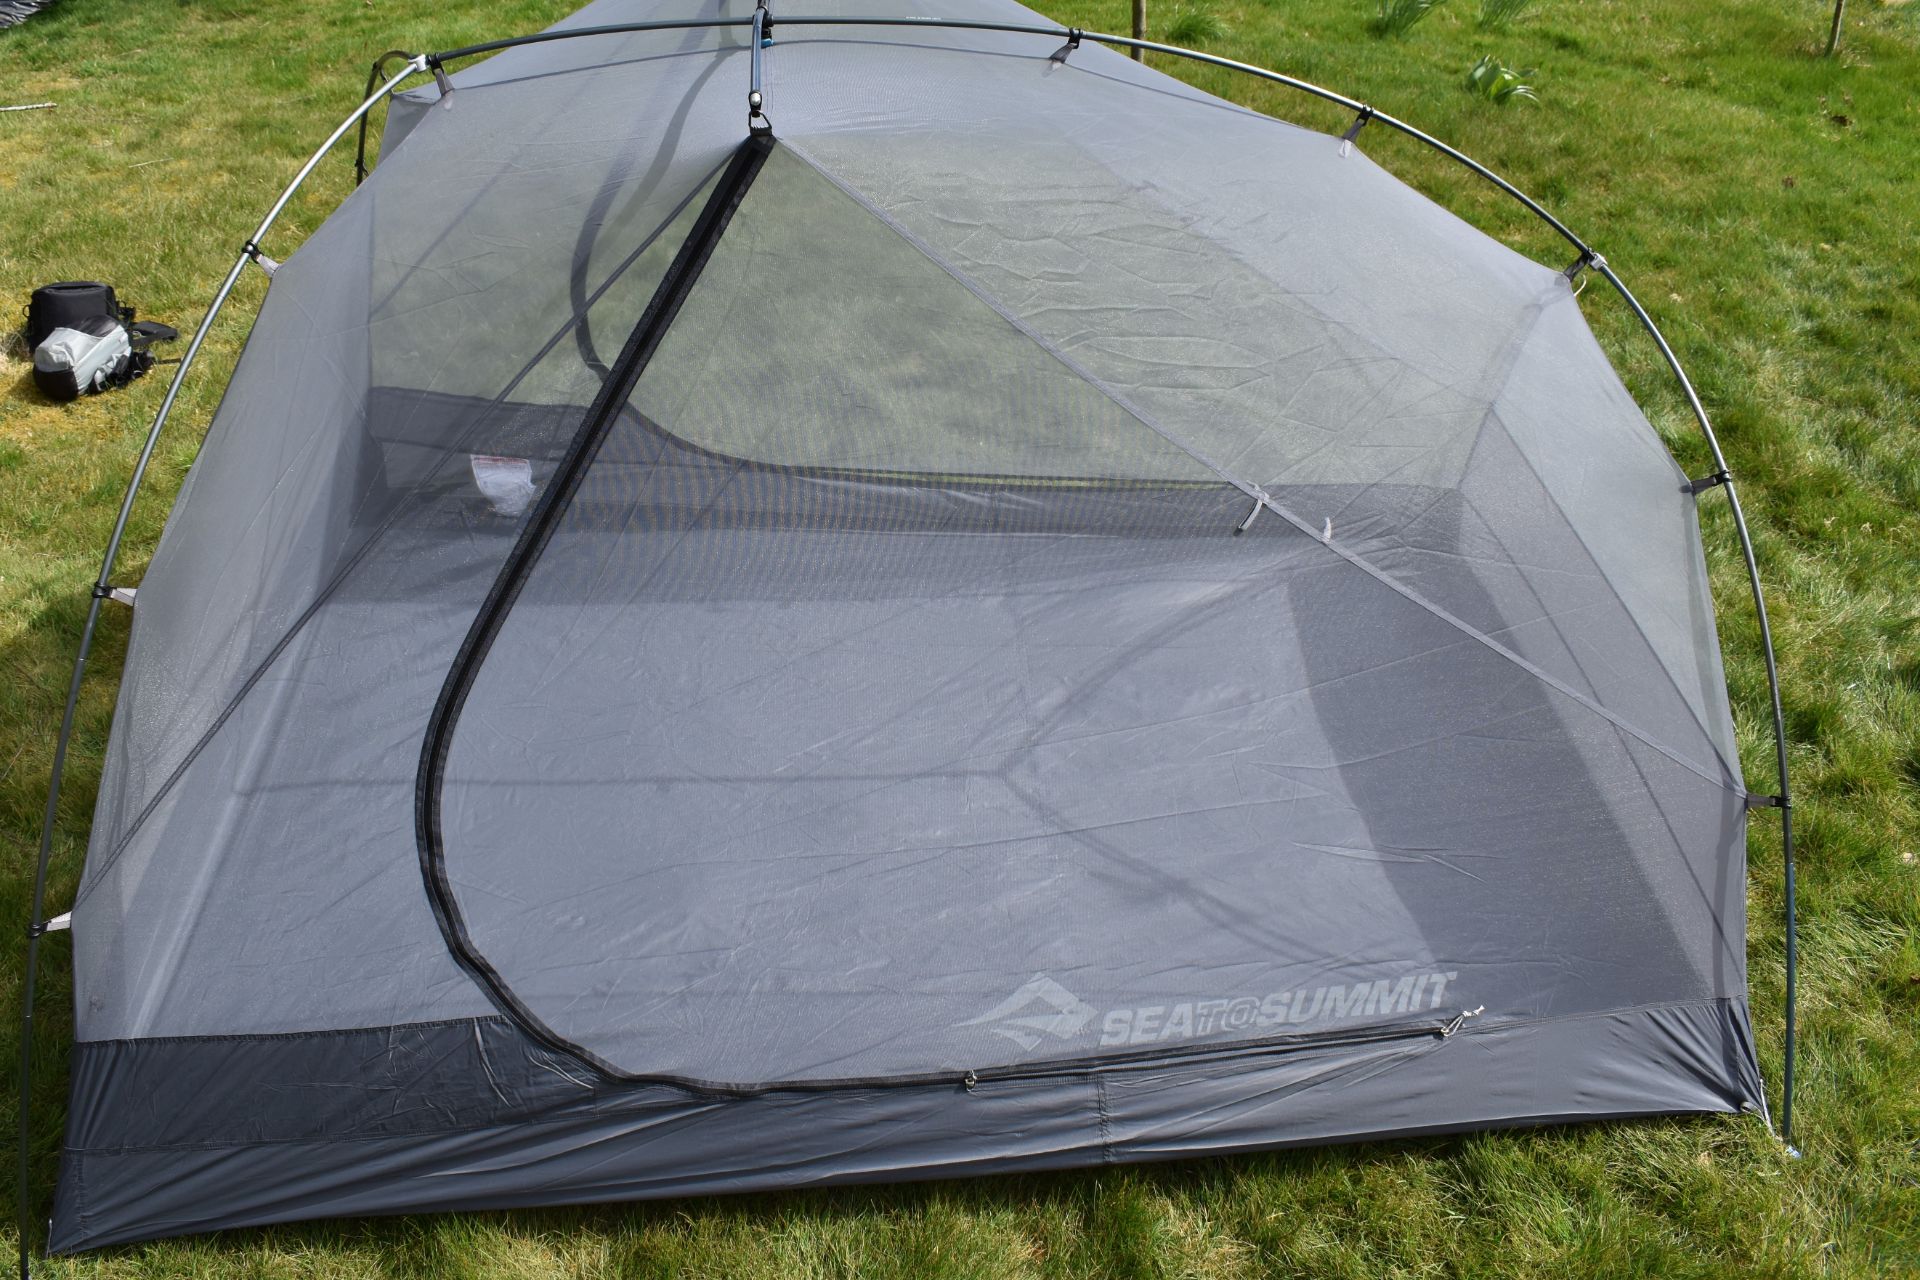
Sea to Summit Telos TR3 Tent – the brand logo is printed on the wall of the foot end
For a long time, we have been without a lightweight backpacking tent which would pack small and provide good weather protection. We were thus head over heels when Sea to Summit offered us to test its Telos TR3 tent in return for an unbiased review. We received the tent a couple of months ago and since then, we’ve been regularly using it for backpacking as well as for camping with our toddler. The Sea to Summit Telos TR3 is an ultralight backpacking tent that sets itself apart from competitive products by its spacious design, incredible ventilation and unmatched versatility. The Telos tent is available in a 2-person and a 3-person version. We decided to go for the 3-person model because we planned to also use it for family camping. Furthermore, the 3-person model is more spacious and thus it’s less likely that you’ll have to leave the gear outside if you are just two people backpacking. For the last two months we’ve been regularly using the Telos tent, investigating its functionality, weather resistance and comfort. Below is what we learned about it.
The Concept
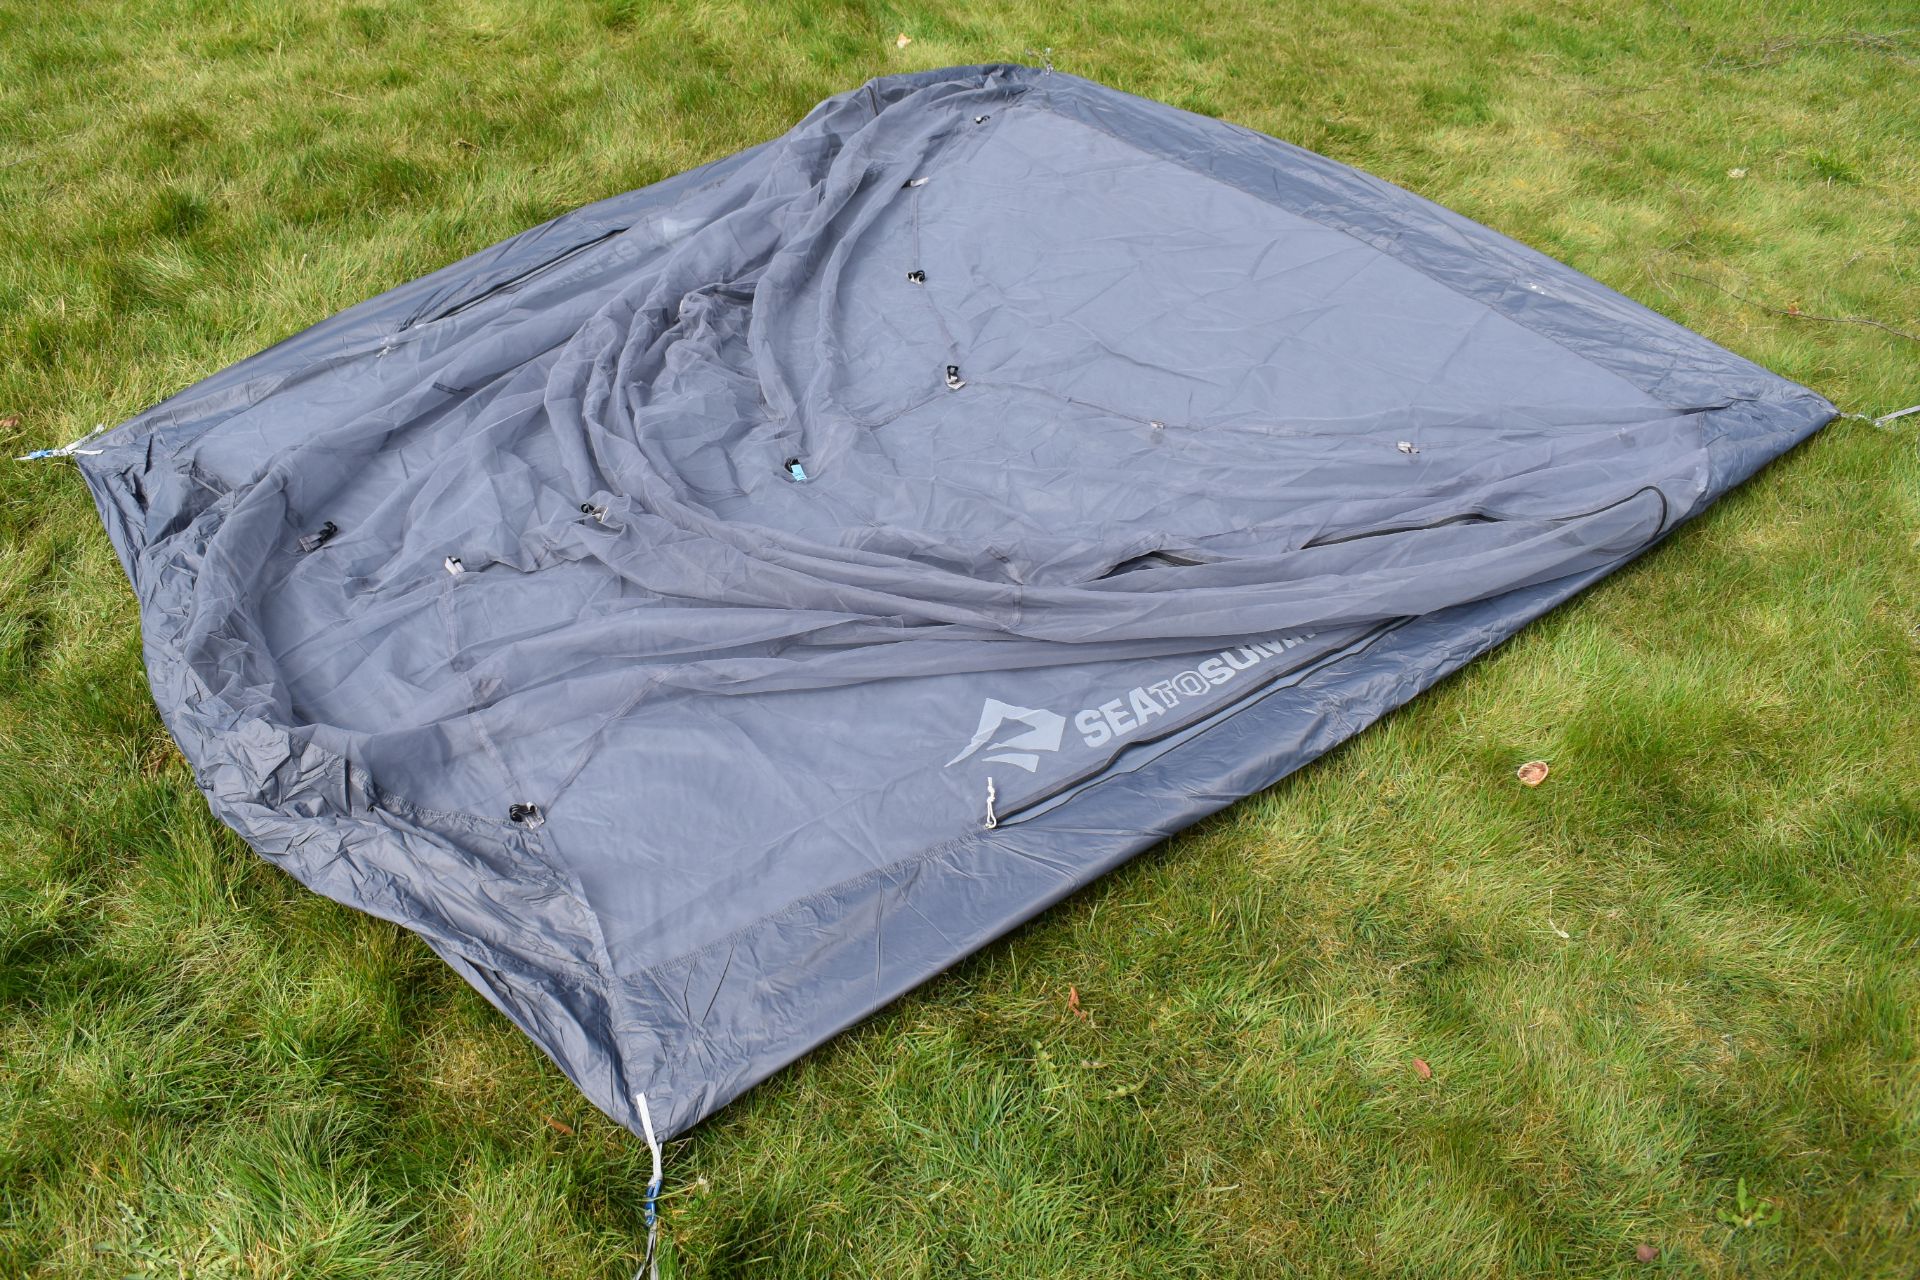
Sea to Summit Telos TR3 Tent - the canopy laid out
The Sea to Summit Telos TR3 tent is a lightweight double-wall backpacking tent and consists of a canopy in the shape of a trapezoid floor with two doors on the sides, and a rain fly, which fully zipped makes the tent into a hexagon. The canopy is narrower in the foot end (147 cm = 58 in.) than in the head end (181 cm = 71 in.) to fit three sleeping pads, which are similarly narrow in the foot area. The tent is also much higher in the head end than the foot end thanks to the Tension Ridge, which essentially is two poles which jut out perpendicular on the long main pole towards the sky in a very flat V-shape. This gives a peak height of 133 cm (52.5 in.) and a very spacious upper part with superior shoulder room in the head end. Three adults can comfortably sit up together in the tent which is not that common when it comes to lightweight backpacking tents.
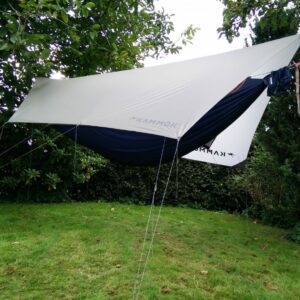
The Sea to Summit Telos TR3 is very versatile as it offers multiple variations in set-up, where you can use both the fly and the canopy on their own or cover the canopy with the fly partially or fully (classic mode). You can also pitch the fly first and then add the canopy afterwards (the dry set-up) if you have to set up camp in bad weather. This is made possible by the fact that the canopy is attached to the pole system with pole hooks while the fly is attached to the pole system with Velcro tabs. This also means that you can switch to another mode after you have set it up. It’s for example super easy to partially roll up the rainfly for stargazing (partial mode) once the tent is fully set up as you can roll up the rainfly from the foot end to the tension ridge or from the head end to the tension ridge. We mostly used the first configuration because it’s perfect for star gazing while having a tent wall behind your head. All in all, we found the tent easy to set up and we were amazed over the different configuration options.
Weight and Packed Size
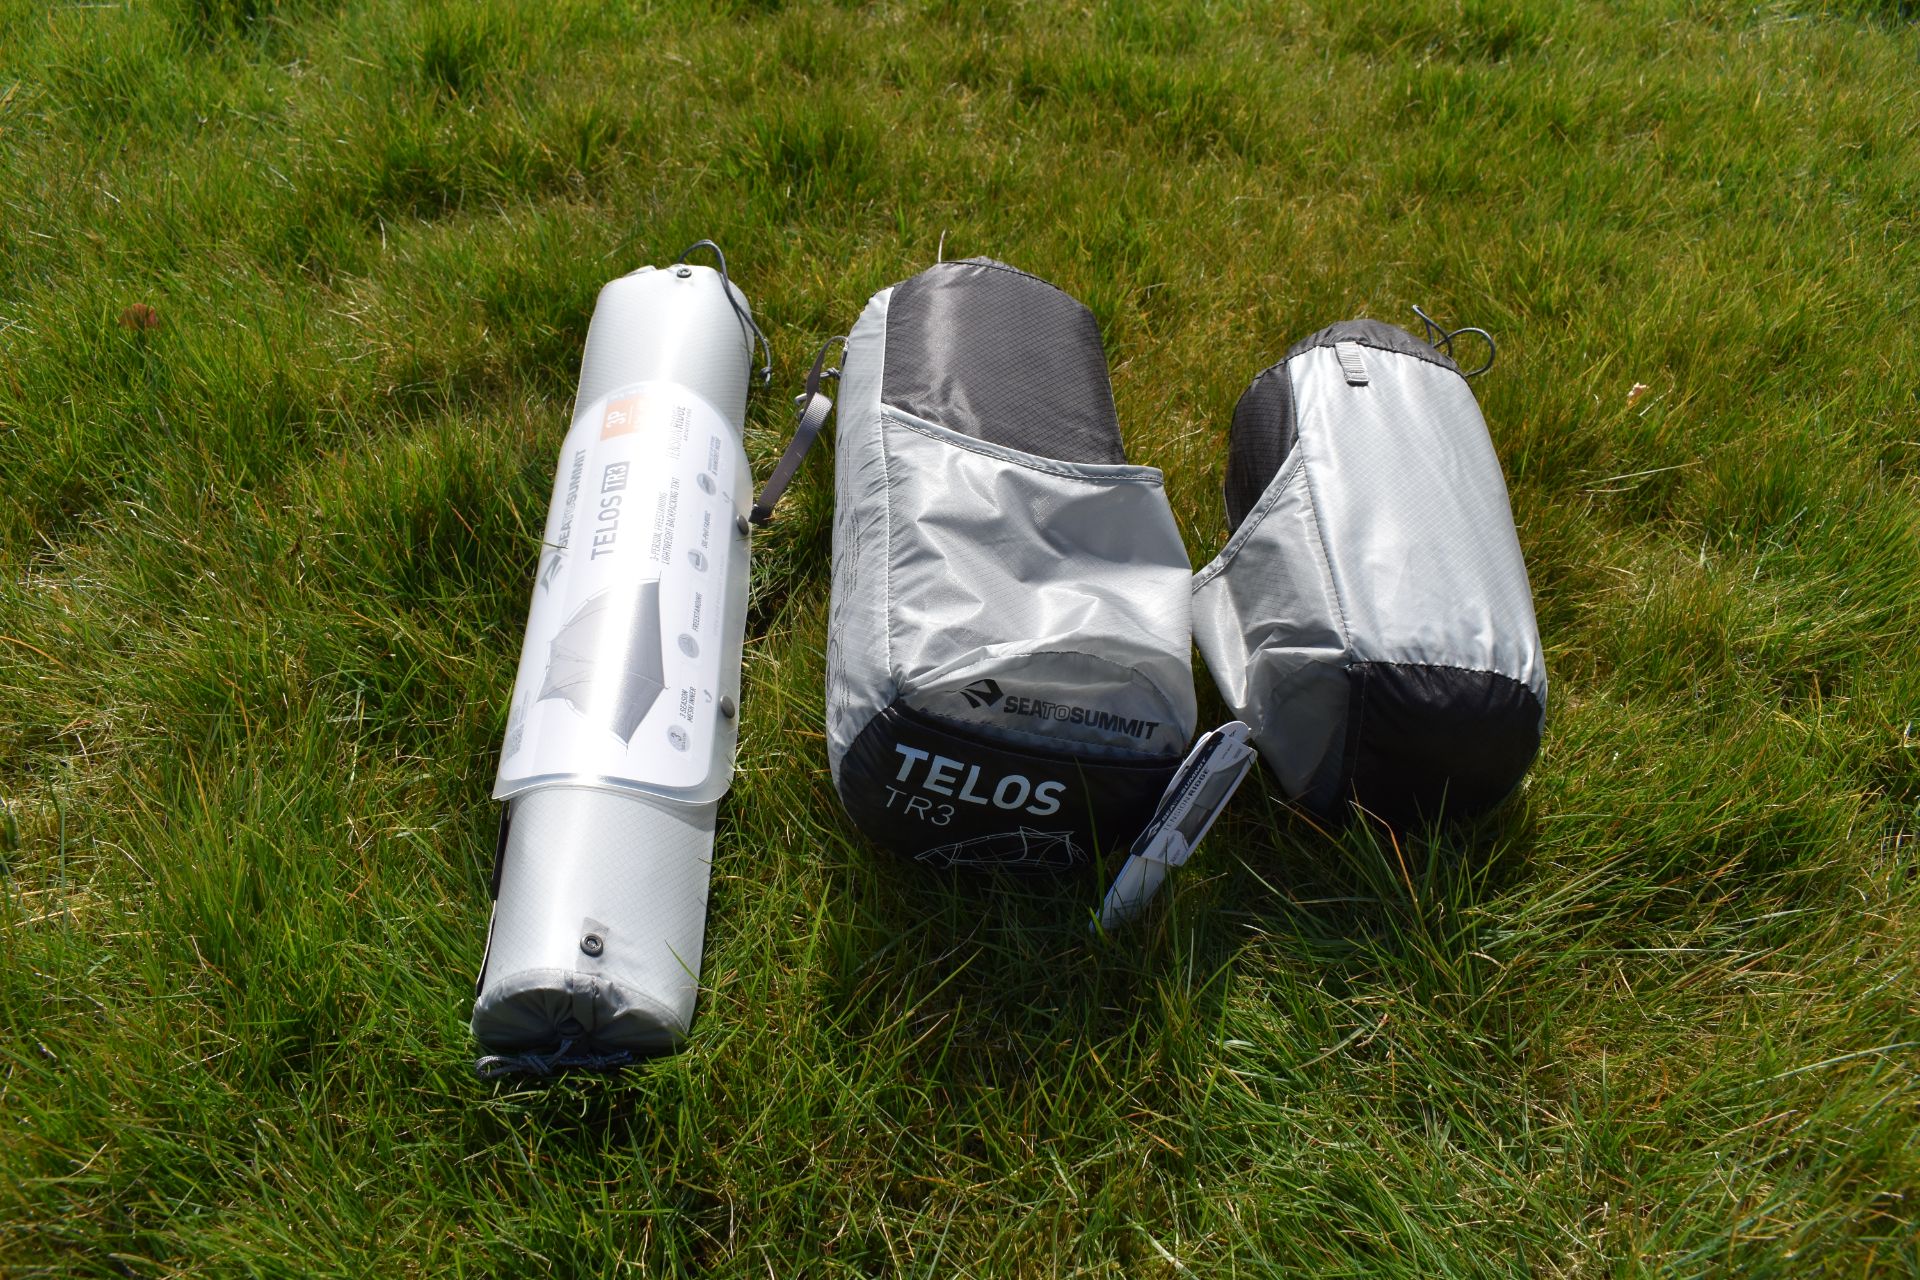
Sea to Summit Telos TR3 Tent - the three stuff sacks laid out
The Sea to Summit Telos TR3 tent weighs 4 pounds and 11 ounces (2.3 kg) which is indeed a very good weight for a 3-person tent. When I unwrapped it, I was really surprised how light it feels. The tent comes in three stuff sacks which weigh approximately the same. Now, you might think that it’s inconvenient that the tent comes in three separate stuff sacks, but actually all Sea to Summit tents are designed that way, so you can split the load with your backpacking buddies or place the stuff sacks wherever most convenient in your pack. The long narrow stuff sack for the poles measures 50 cm in length and 7.5 cm in diameter (19 in. x 3 in.) and doubles as a lightbar, as there is a translucent diffuser inside the sack, which turns the bright light of one or two headlamps into soft overall lighting when you attach the bag to the ceiling.
The other two stuff sacks can be attached to the corners of the tent for storing essential gear which you want to have close by. The larger one of the two contains the canopy and a small pouch with pegs, guylines and repair kit, and measures 33 cm x 12 cm (13 in. x 4.5 in.). The smaller one measures 26 cm x 14 cm (10 in. x 5.5 in.) and contains the rainfly. The three stuff sacks can also be connected to one another by inserting the long narrow stuff sack into a side pocket on each of the smaller stuff sacks. However, I don’t really see a point in doing that while on the go. Even if you’re out alone, it’s easier to pack the tent in a backpack if it’s in three separate pouches. All in all, I’ve been extremely happy with the weight and packed size of the tent. Some competitive products are a bit lighter and pack slightly smaller, but they also don’t match the Telos tent in terms of comfort and versatility.
Set-Up and Color Coding
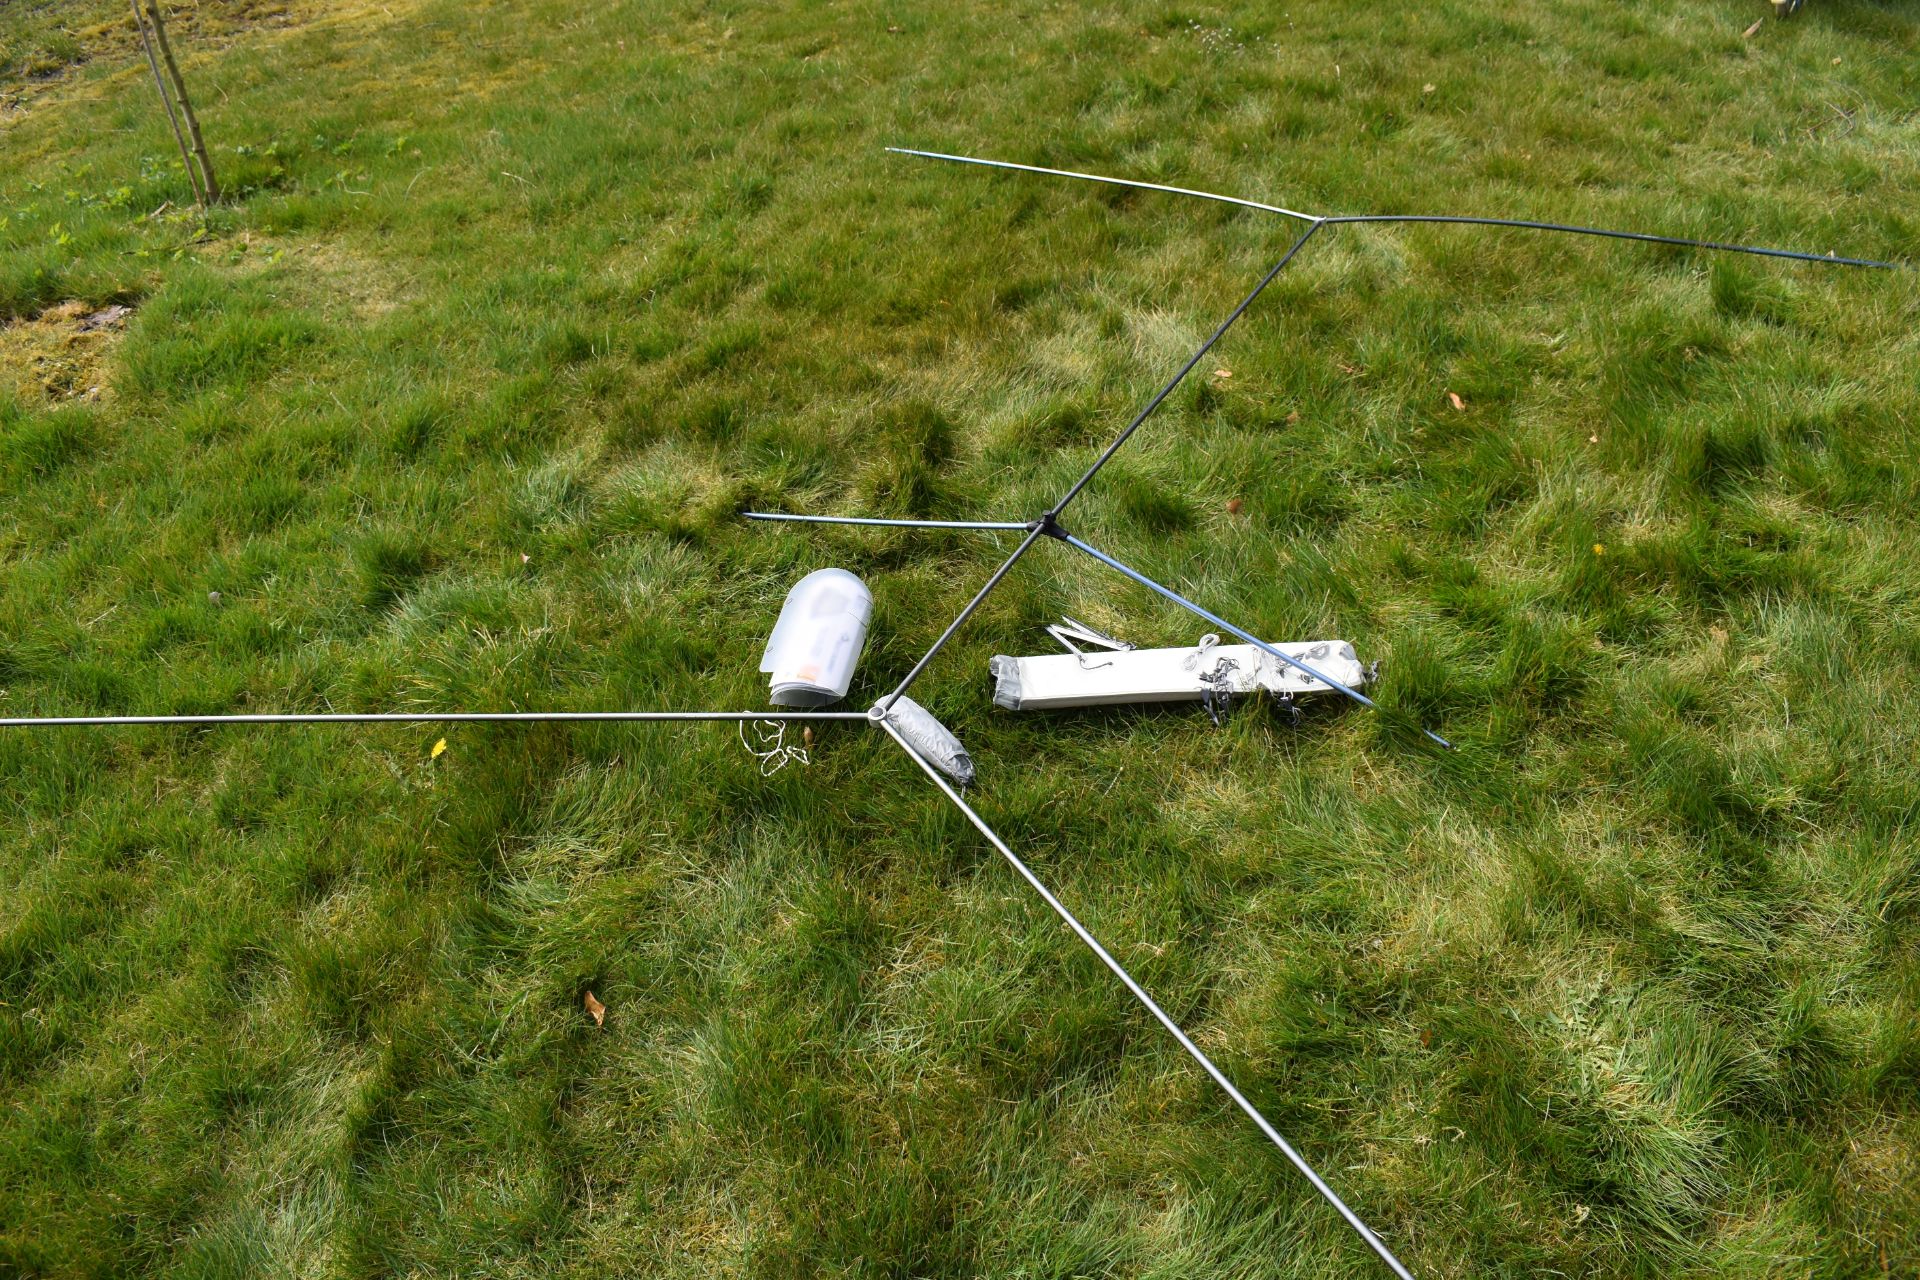
Sea to Summit Telos TR3 Tent - the DAC poles assembled into an H-shape with slanted sides and an extra arm (=the Tension Ridge)
Sea to Summit offers a really good and detailed set-up video for the various set-ups, so I won’t describe the process step by step, but rather go over some details which might help you set it up faster. Indeed, the Sea to Summit Telos TR3 tent is super-easy to set up, but especially if you pay attention to the color coding of the various components. Essentially this means that the parts for the narrower and lower end of the tent (foot end) as well as the Tension Ridge on the taller and wider end of the tent (head end) are colored steely blues.
You will especially see this when you assemble poles into a large H-like shape, where the vertical lines are slanted and one line longer than the other. Close to the longer line, there is also a much shorter extra line, which is the Tension Ridge. Both the Tension Ridge and the pole tips of the shorter end are colored blue, although the latter are less shiny. These blue pole tips go into the blue-colored inner feet, which are located on the corners of the narrow end of the canopy. Similarly, the narrow end of the rainfly is equipped with two blue aluminum clips in each corner which are easily clipped on to the blue inner feet. The blue Tension Ridge is connected to the high end of the canopy via a central H-clip (attached with a blue strap) that clips onto the middle of the Tension Ridge.
Please note when you want to connect the ends of the Tension Ridge to the canopy as well as the fly, that the color coding here applies for each side of the Tension Ridge. On one side (where the Sea to Summit brand name and logo are printed on the fly), the end of the Tension Ridge hooks onto a blue loop on the canopy and should fit into a pocket with a blue strap on the inside of the fly. On the other side it hooks onto a grey loop on the canopy and should go into a pocket marked with a grey strap on the inside of the fly. This may sound complicated, but the color coding helps you with a faster and smoother set-up once you get used to it. It's especially convenient that you can quickly figure out what’s the foot area and what’s the head area of the tent, so you can position the tent optimally with regards to wind direction etc.
Comfort and Functionality
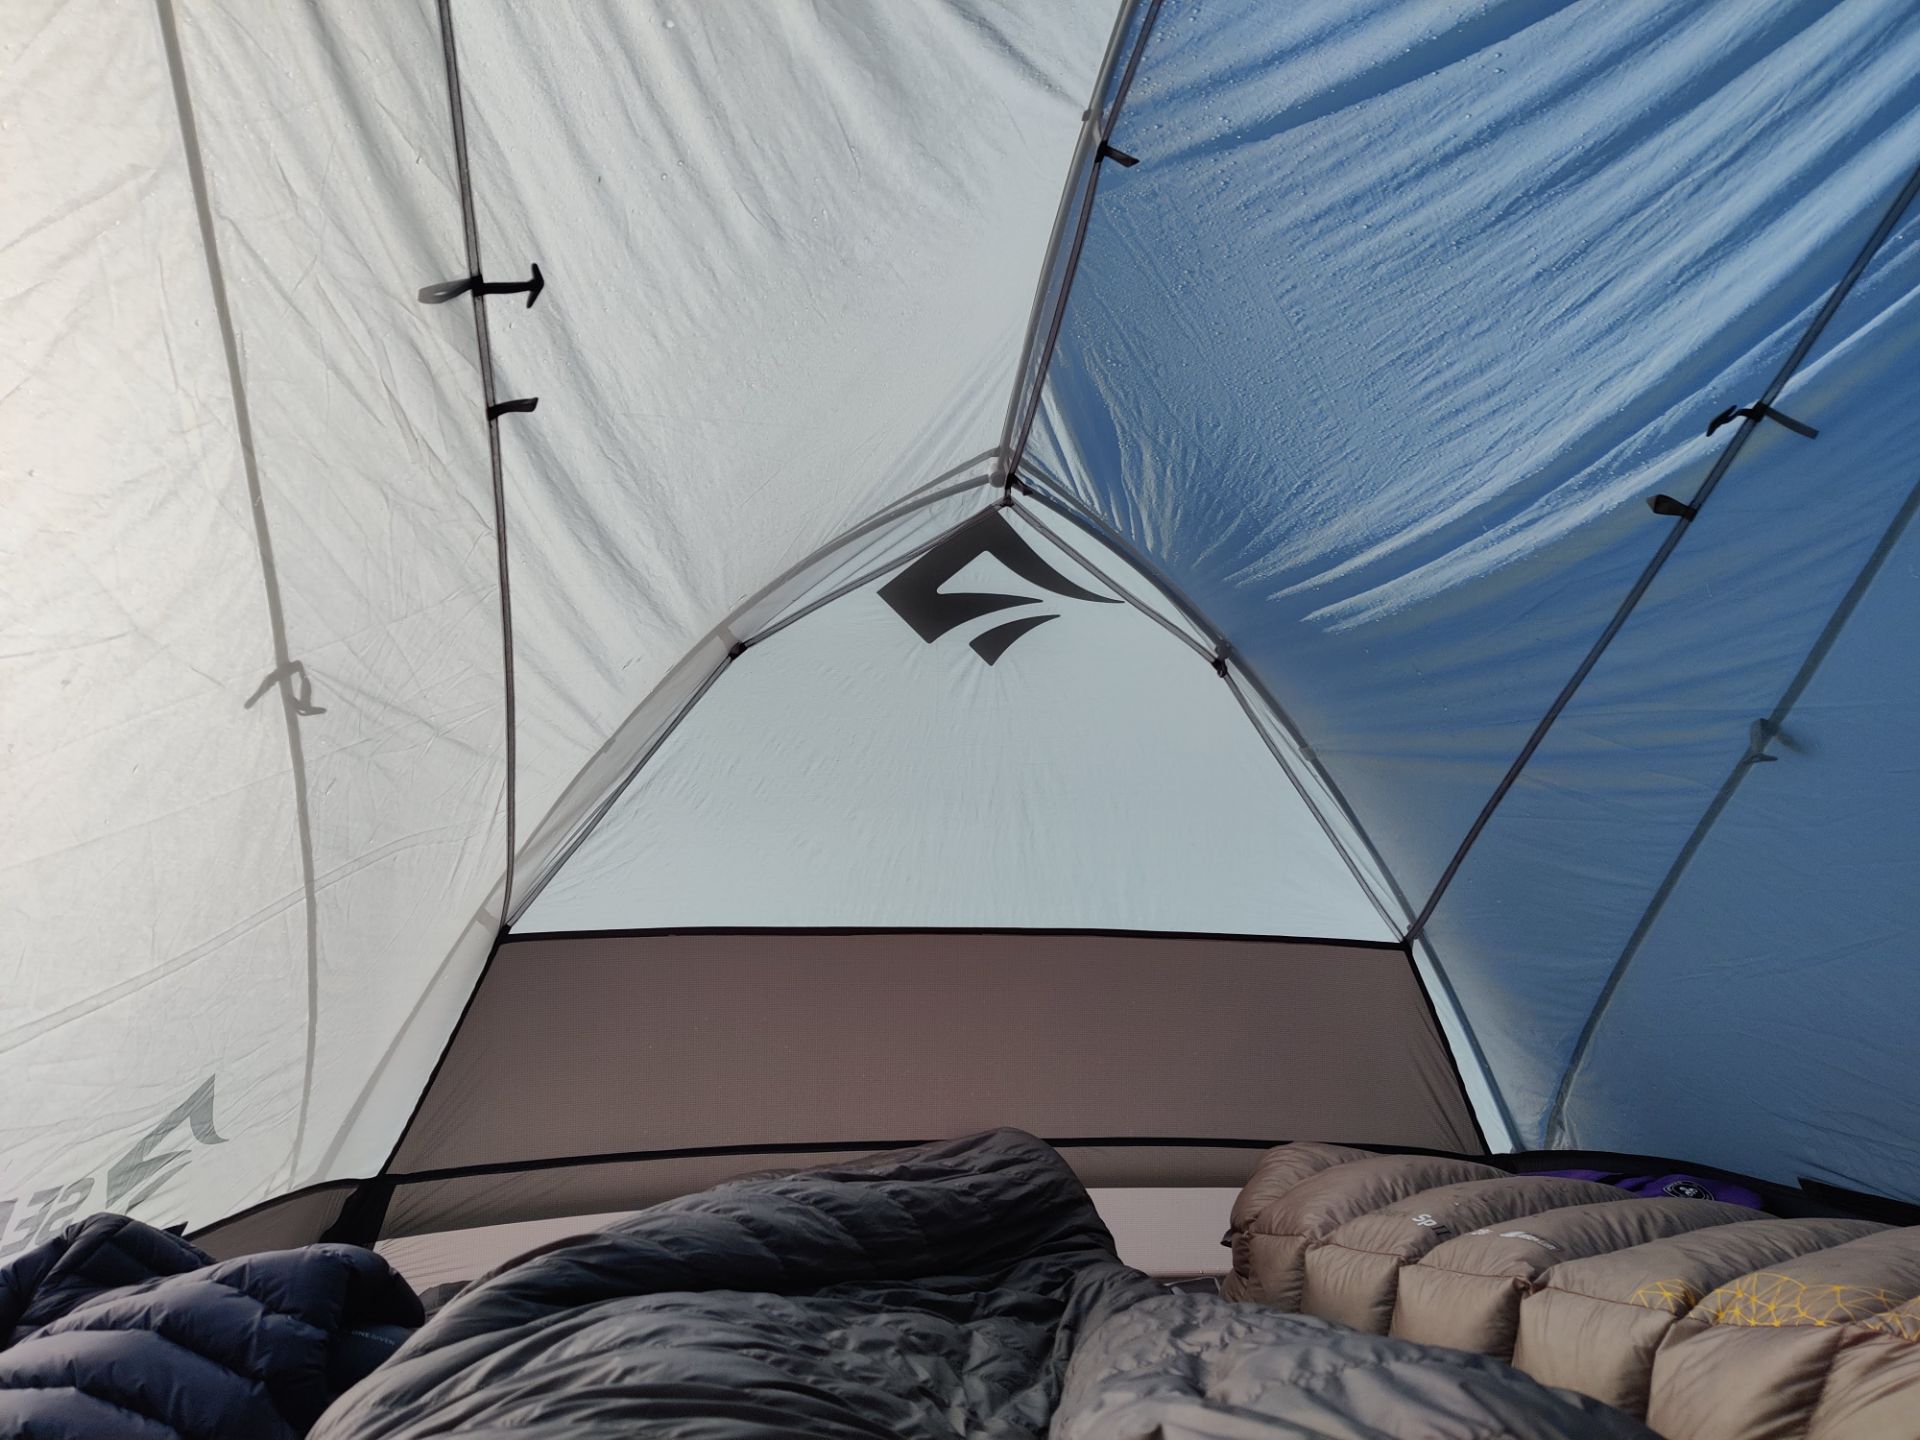
Sea to Summit Telos TR3 Tent - the inside feels very spacious
The Sea to Summit Telos TR3 tent is extremely comfortable to camp in and has several very neat features. The Tension Ridge provides both a superior peak height, ample shoulder room and good ventilation through the Apex vent once inside the tent. The full length inside the tent is 230 cm (91 in.), and the rather steep walls (again due to the Tension Ridge) make it feel very spacious. It’s very convenient that the tent is quite long because there is quite some free space at the feet for storing backpacks and gear. We thus never lacked space in the tent, and were also very happy with storage options. The tent has two large mesh pockets on the sides and the stuff sacks can be attached to the corners of the tent. Nevertheless, the most awesome thing is for sure the lightbar/stuff sack which clips to the ceiling of the tent for soft lighting.
As for getting in and out of the tent, it is really easy due to the large doors (especially their height), which are placed on both sides. When using both the canopy and fly, the Sea to Summit tent also has two vestibules which cover 1 m2 each. They’re big enough to leave some gear out there but definitely not as big as vestibules of camping tents, where you might even be able to hang out.
Weather Resistance
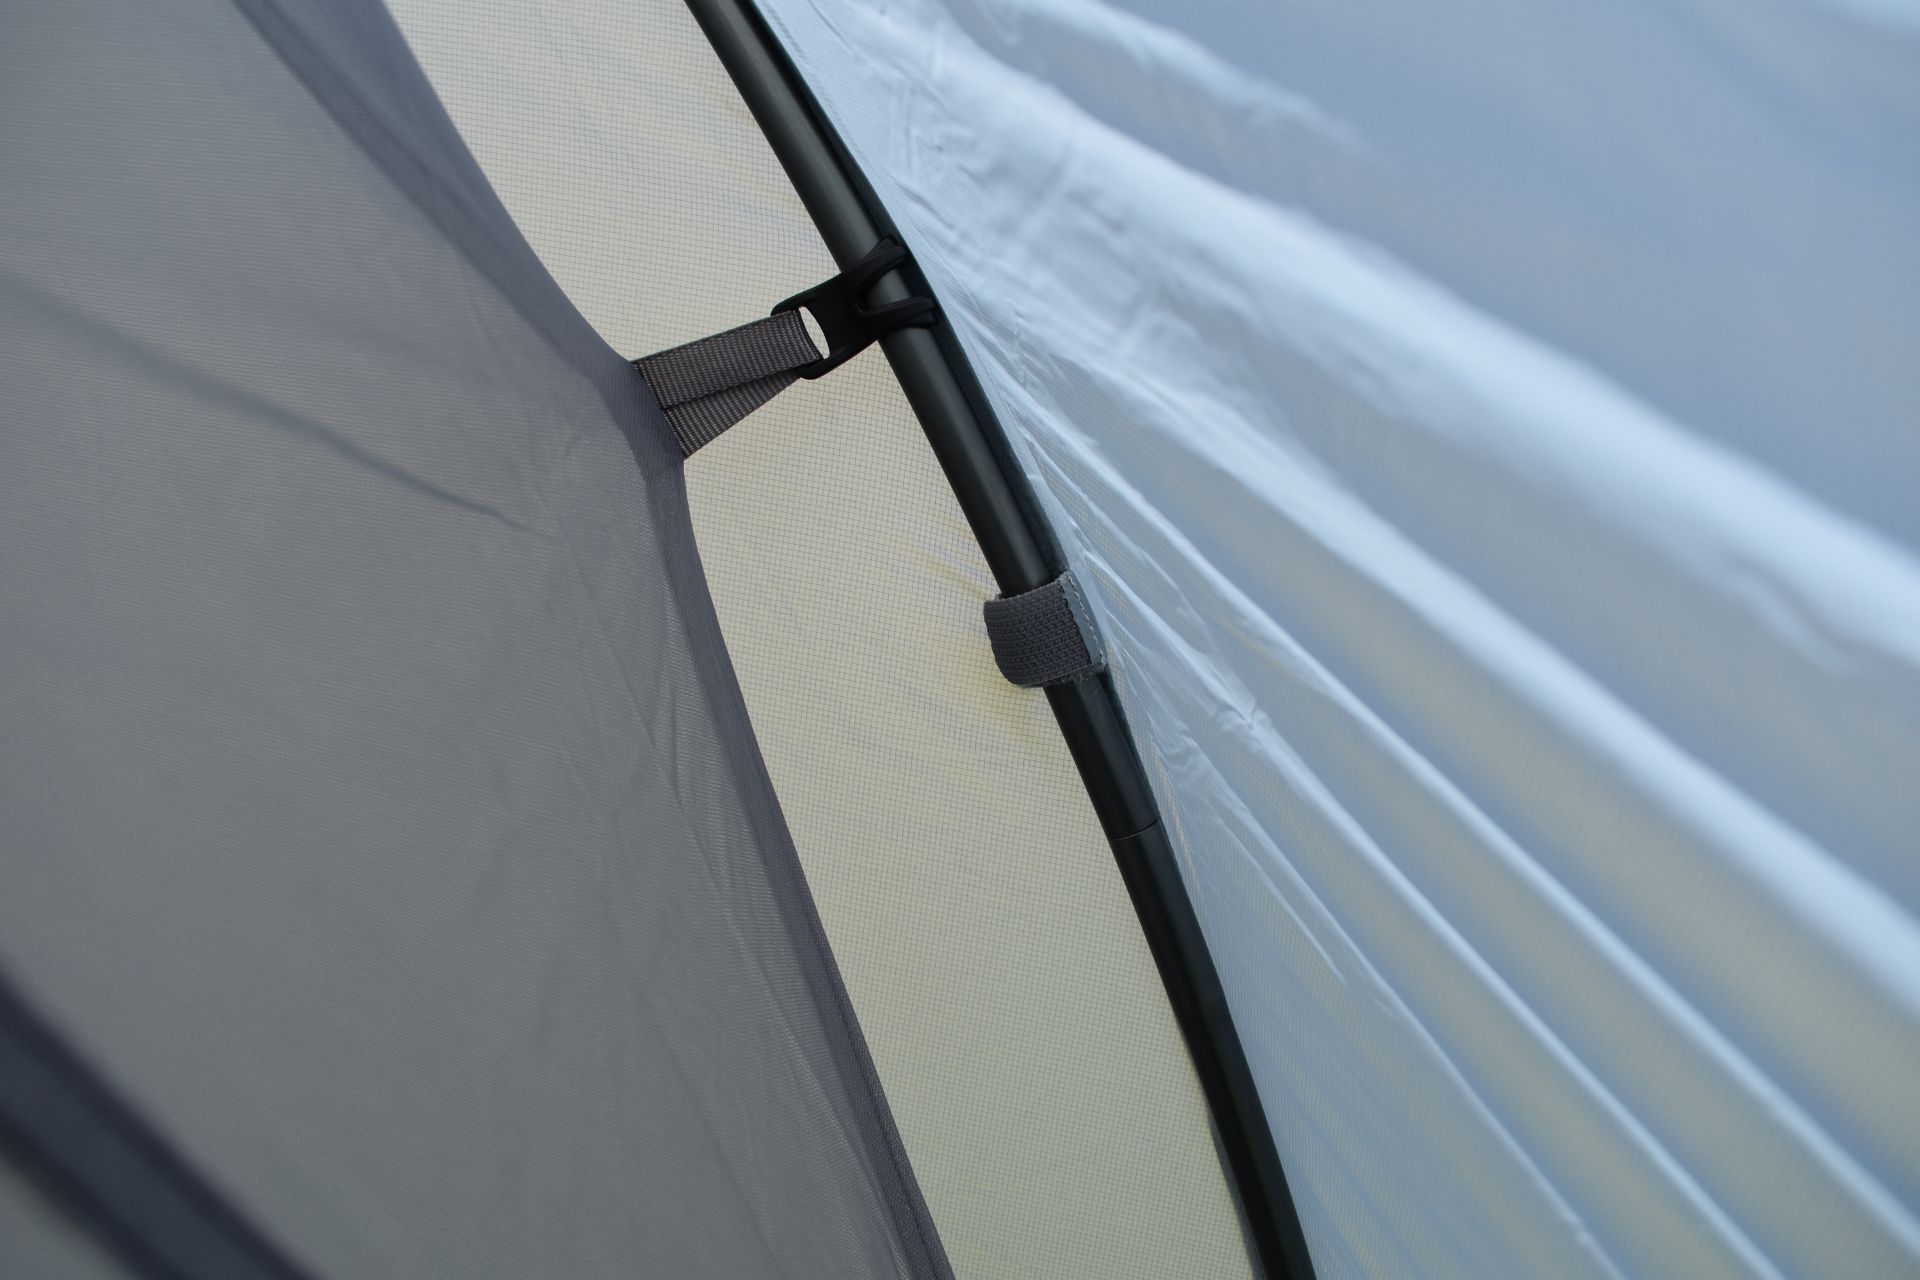
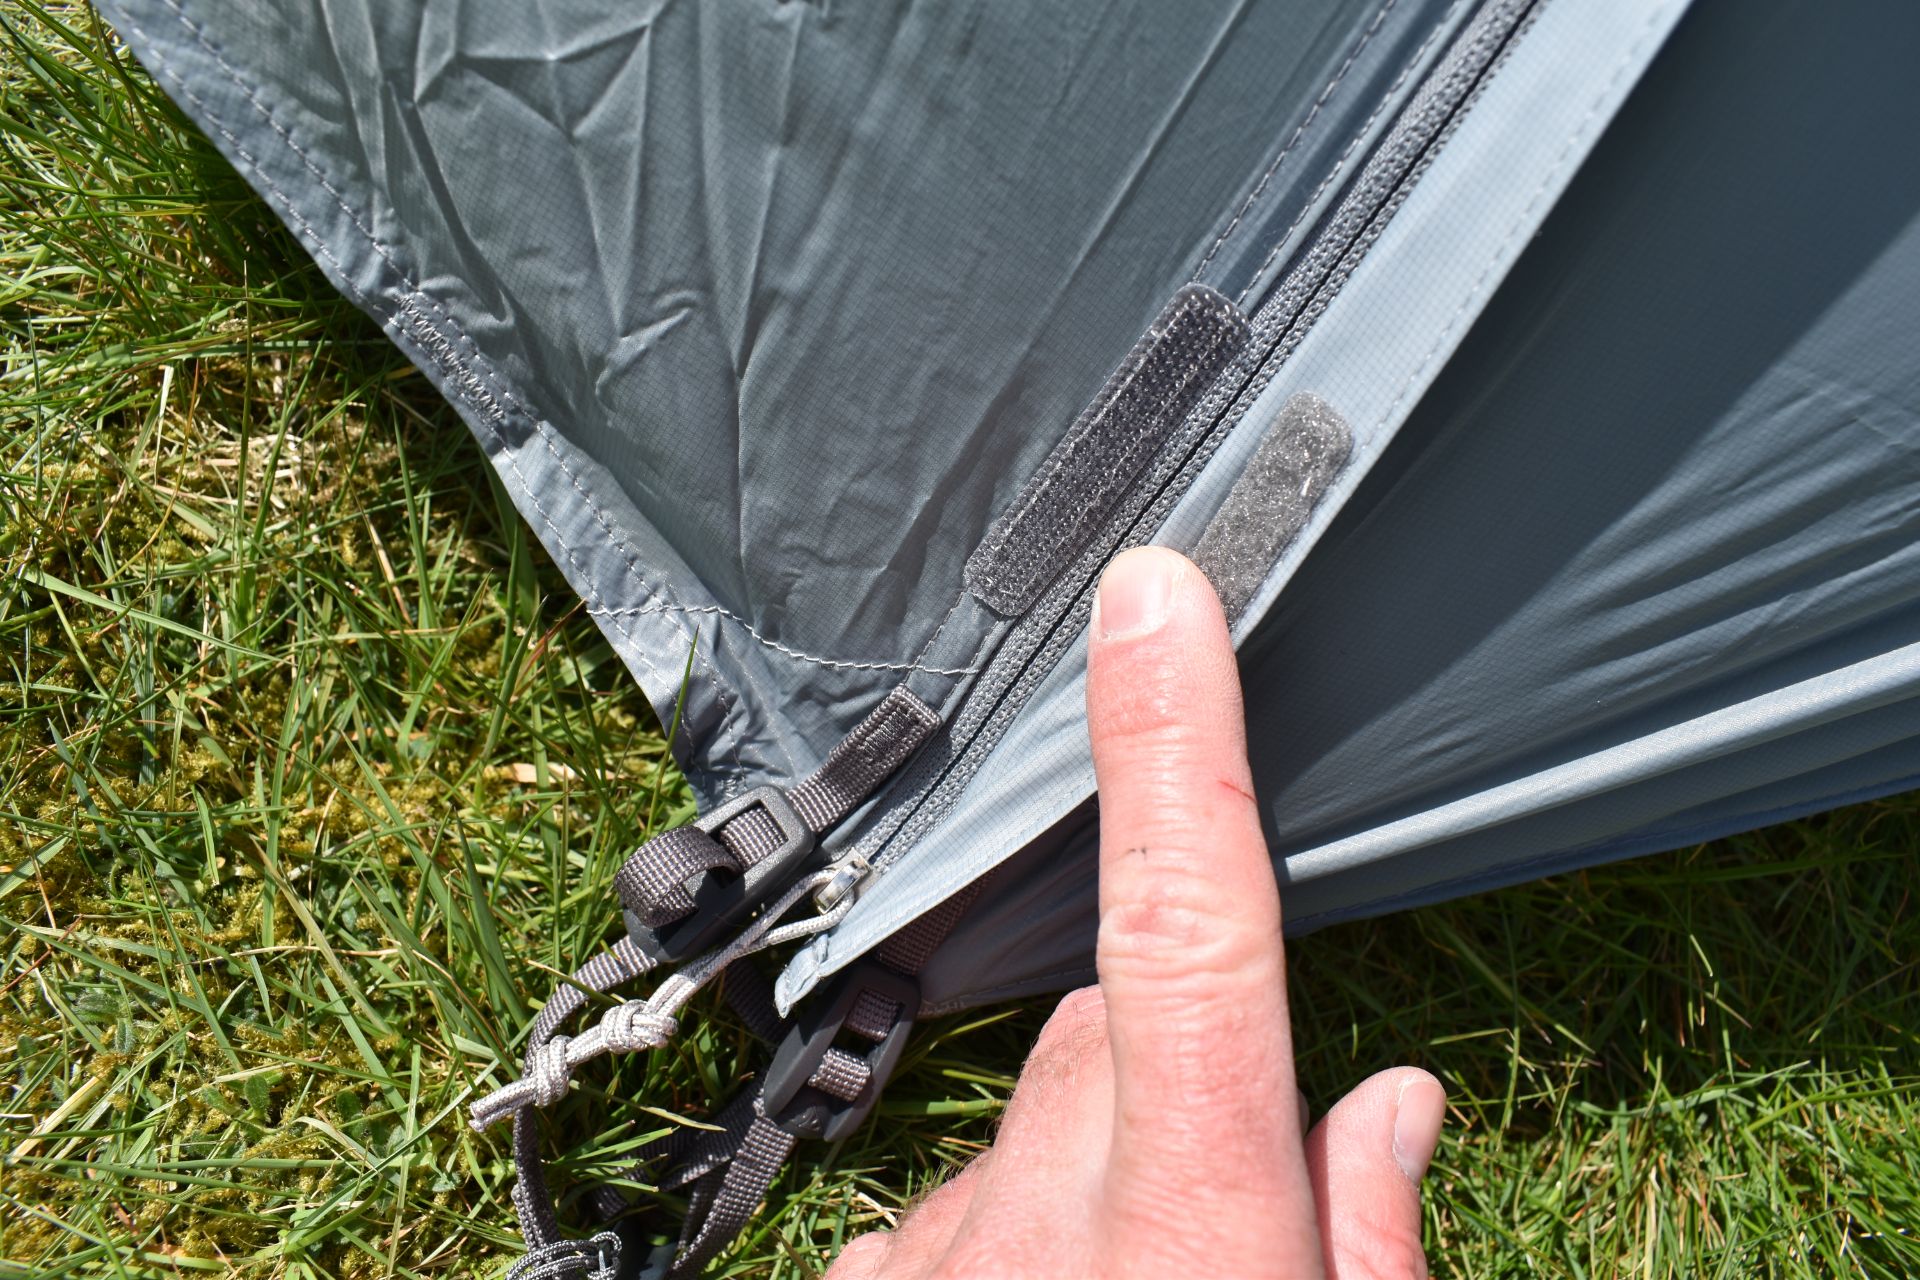
Sea to Summit Telos TR3 Tent - the canopy is attached to the poles with hooks while the fly is attached with velcro tabs
We haven’t yet used the tent in very bad weather, but the tent performed well in light rain and windy weather. At first, I was a bit worried that the tent will be unstable in windy conditions because it’s quite high. Nevertheless, my worries proved unnecessary. The tent didn’t have any problems resisting relatively strong wind gusts. The rainfly nicely covers the canopy all the way to do ground and thus I’m confident that the tent is also suitable for heavy rainfall. In terms of condensations resistance, we were also impressed. There was very little condensation on the walls in the morning – especially if we aired out the warm tent towards evening. We did, however, always have the big ceiling vent opened throughout the night. The tent is equipped with a very big vent to prevent condensation. This vent can be closed with the zipper on the outside if necessary.
Materials and Durability
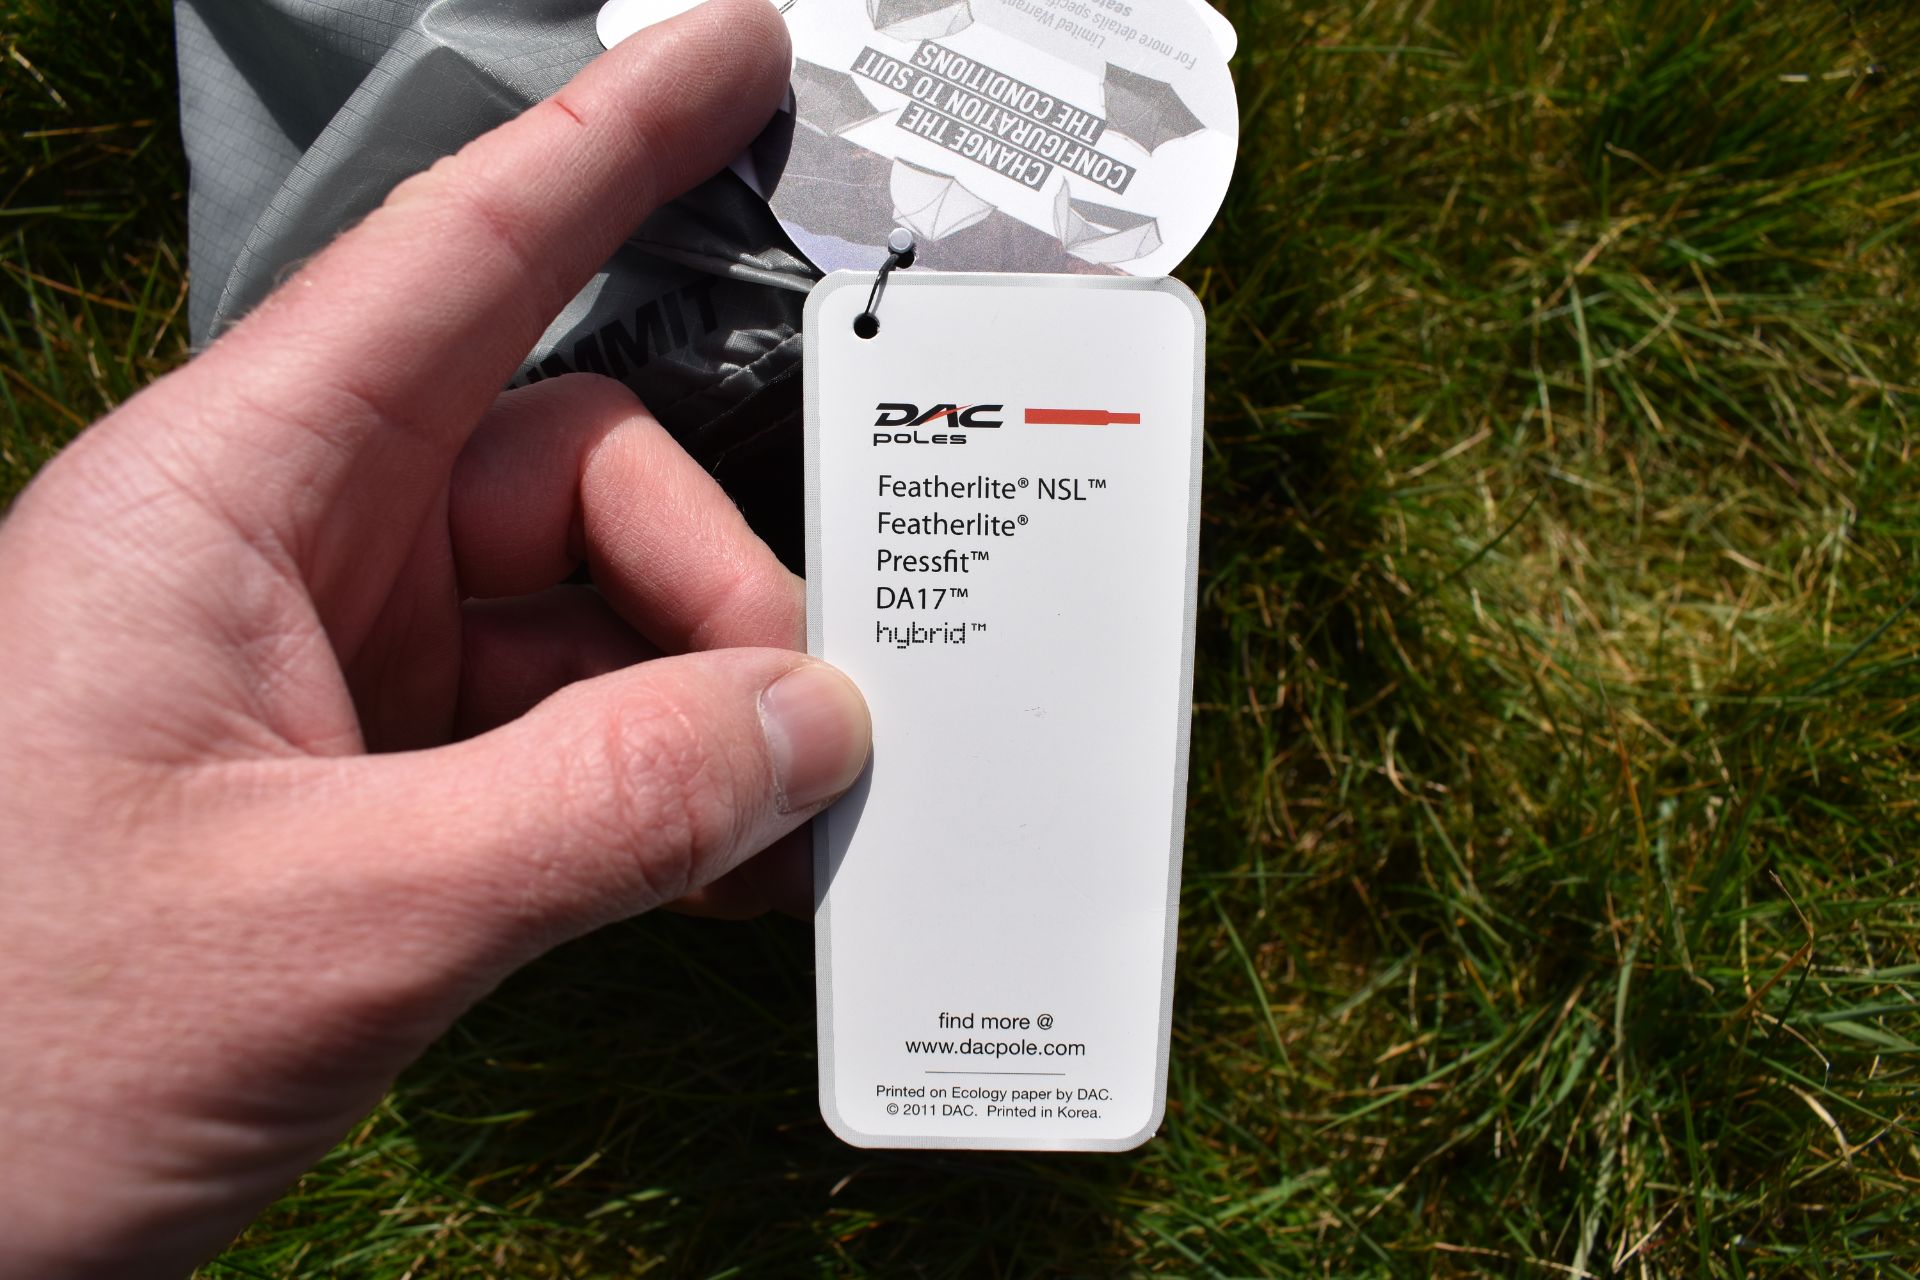
Sea to Summit Telos TR3 Tent - DAC poles are made of the best materials
Like all other lightweight high-quality backpacking tents, the Sea to Summit Telos TR3 is designed as a compromise between weight and durability. Thicker heavier materials are often more durable but not much good for carrying on the go. Nevertheless, I was impressed how sturdy and robust the components of the Telos tent are. That goes for literally every piece from the DAC poles to pegs. The only thing that I found not to be quite so robust is the floor of the canopy. The floor is made of a relatively thin 20-denier ripstop nylon, and I wouldn’t dare to pitch the tent somewhere rocky without a footprint. Sea to Summit sells the footprint separately. This is literally the only issue I have with the Sea to Summit Telos tent. Currently it retails for about 659 $ (2-person tent for 559 $), and for that price I do think it would reasonable that the footprint would be included, at least when I compare with the prices of competitive lightweight backpacking tents from other brands. If you choose to purchase the footprint from Sea to Summit, you can choose between two footprints: LightFoot and BigFoot (available both in the 2- and 3-person size). The LightFoot only covers the canopy floor while the BigFoot also covers vestibule areas. In any case, I highly recommend buying a footprint as well to prolong the lifespan of the canopy floor.
Photos
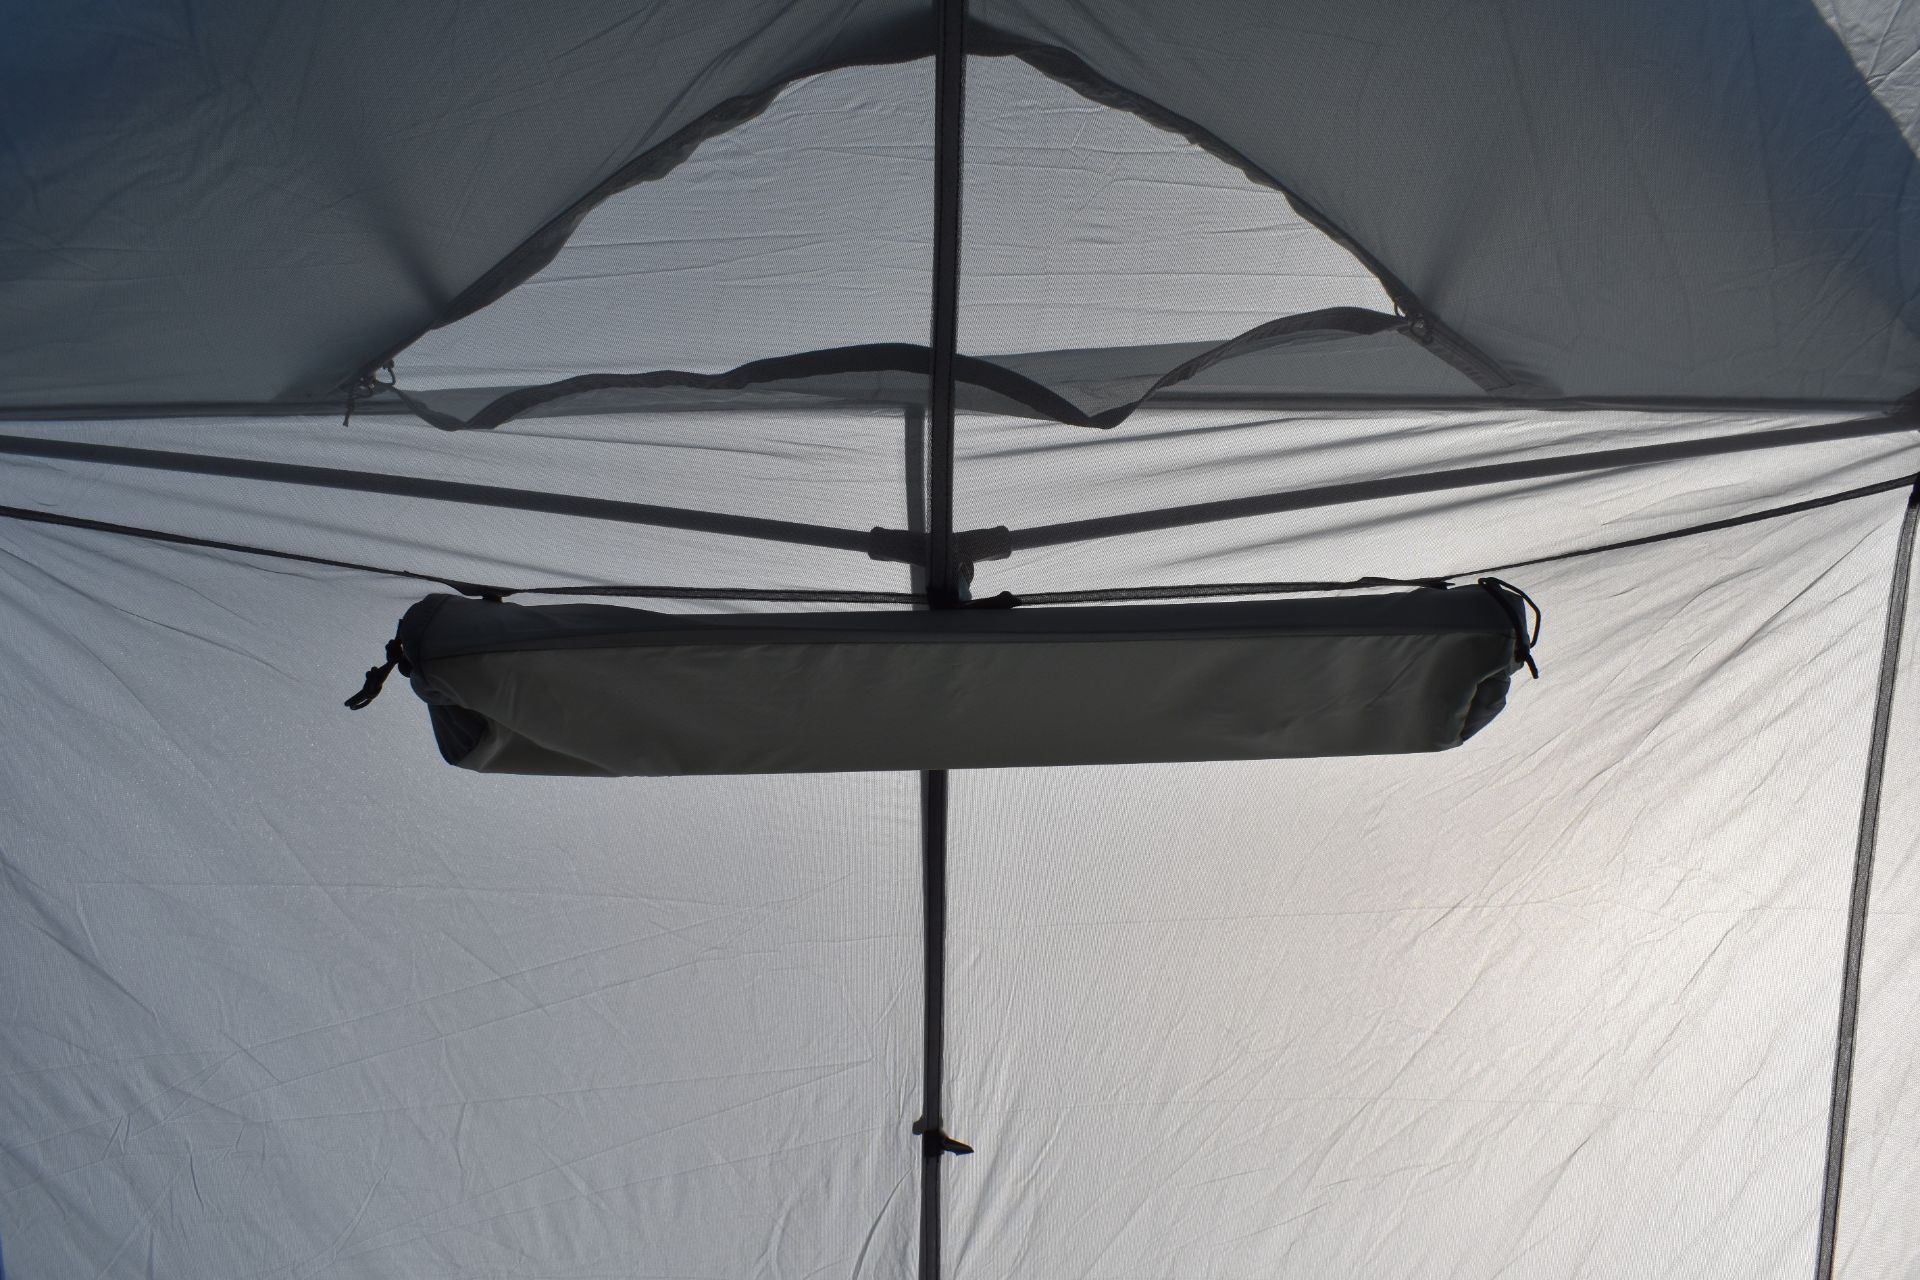
Sea to Summit Telos TR3 Tent - the pole stuff sack doubles as a light bar
Sea to Summit Telos TR3 Tent - the double doors are very big and easy to enter and exit through
Sea to Summit Telos TR3 Tent - the zippered doors of the fly can be secured additionally with velcro
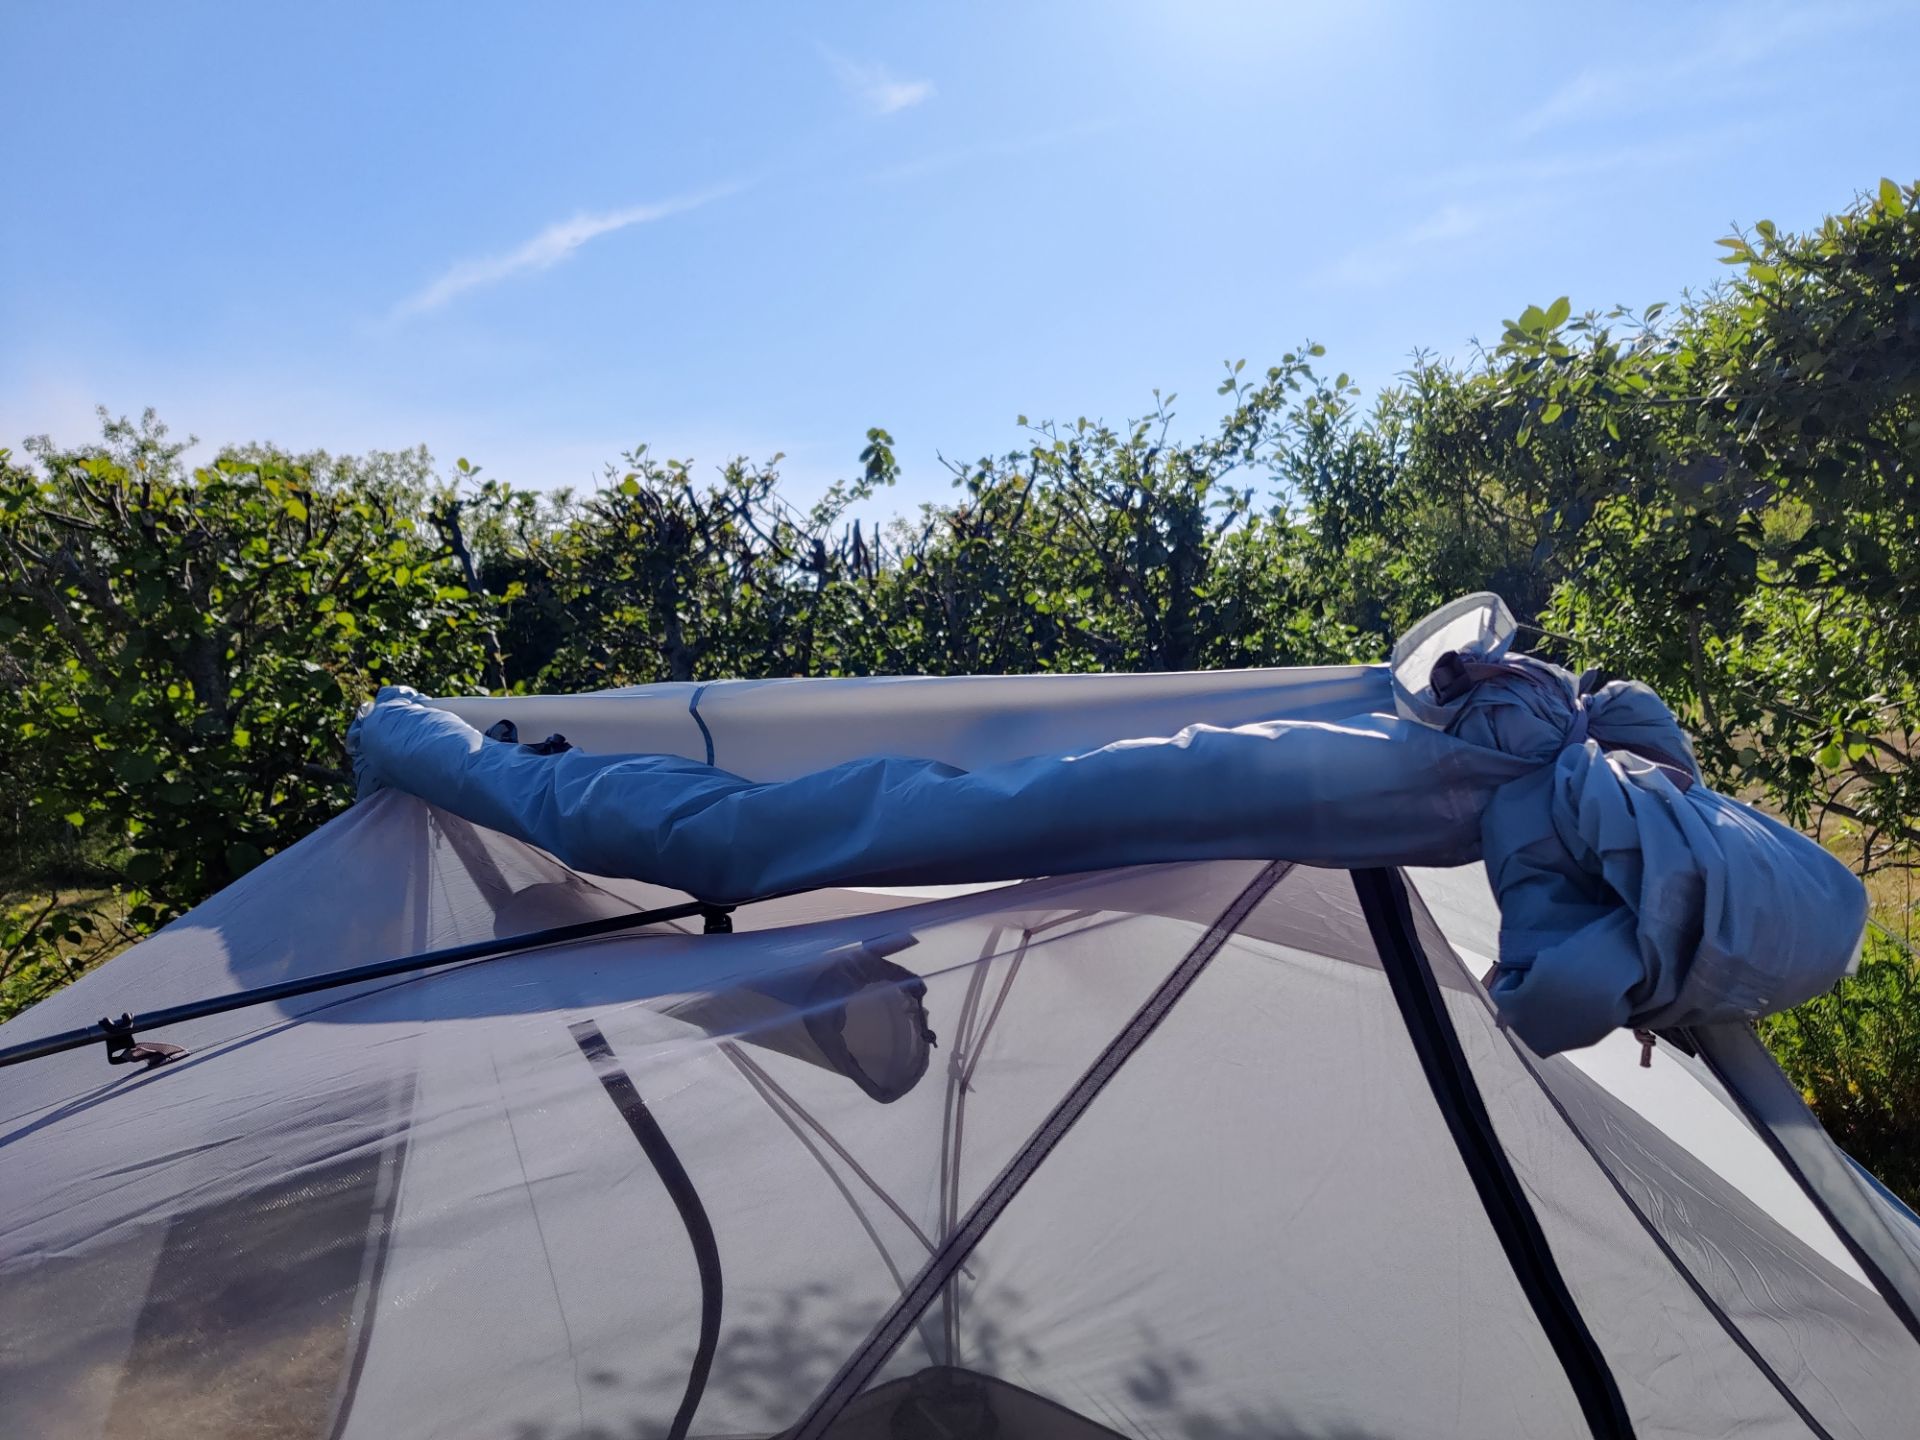
Sea to Summit Telos TR3 Tent - part of the fly is rolled back in partial mode
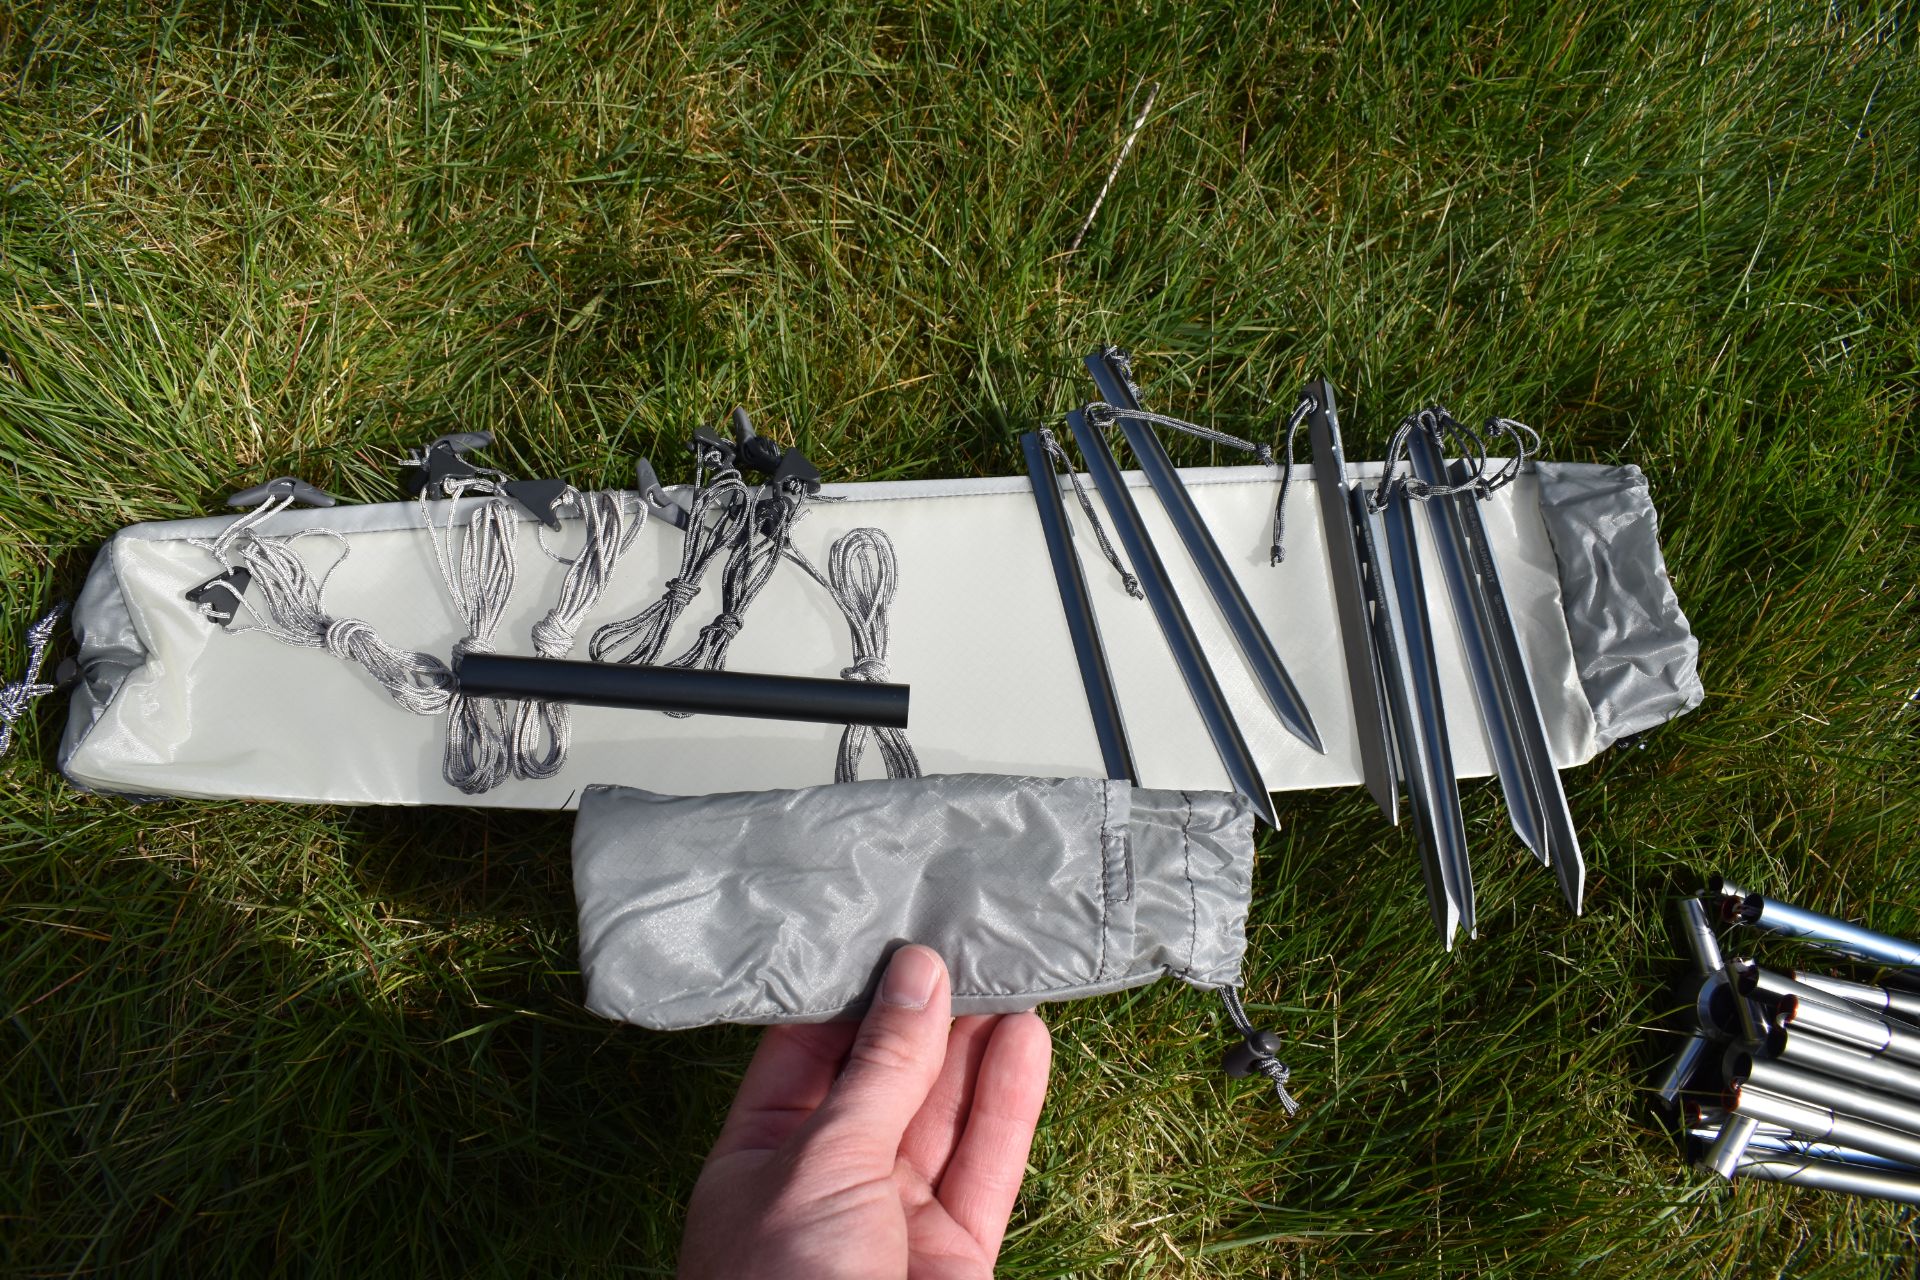
Sea to Summit Telos TR3 Tent - pegs, poles and guylines inside the pole stuff sack
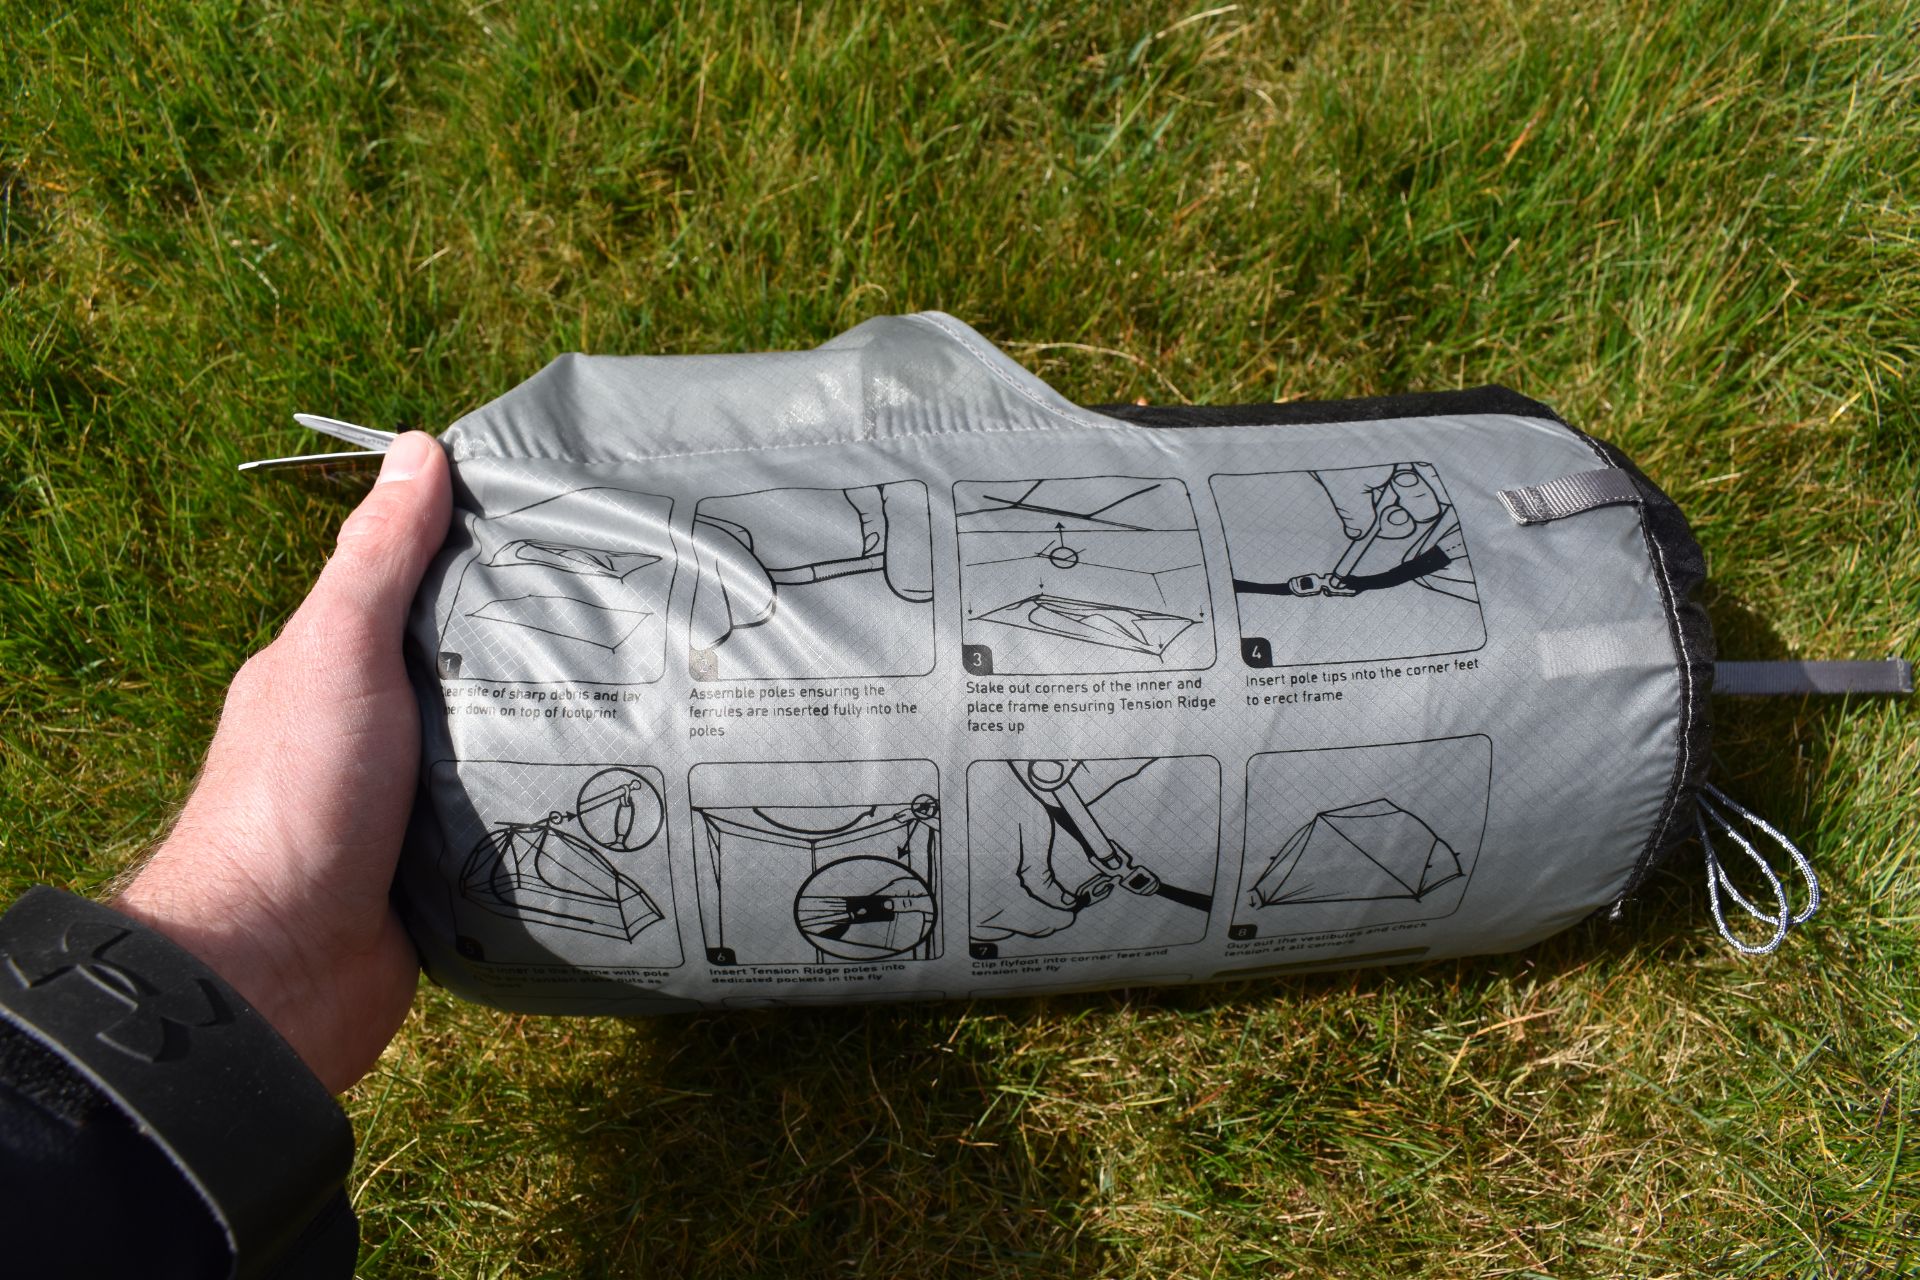
Sea to Summit Telos TR3 Tent - instructions are also printed on stuff sacks as well as handy brochure
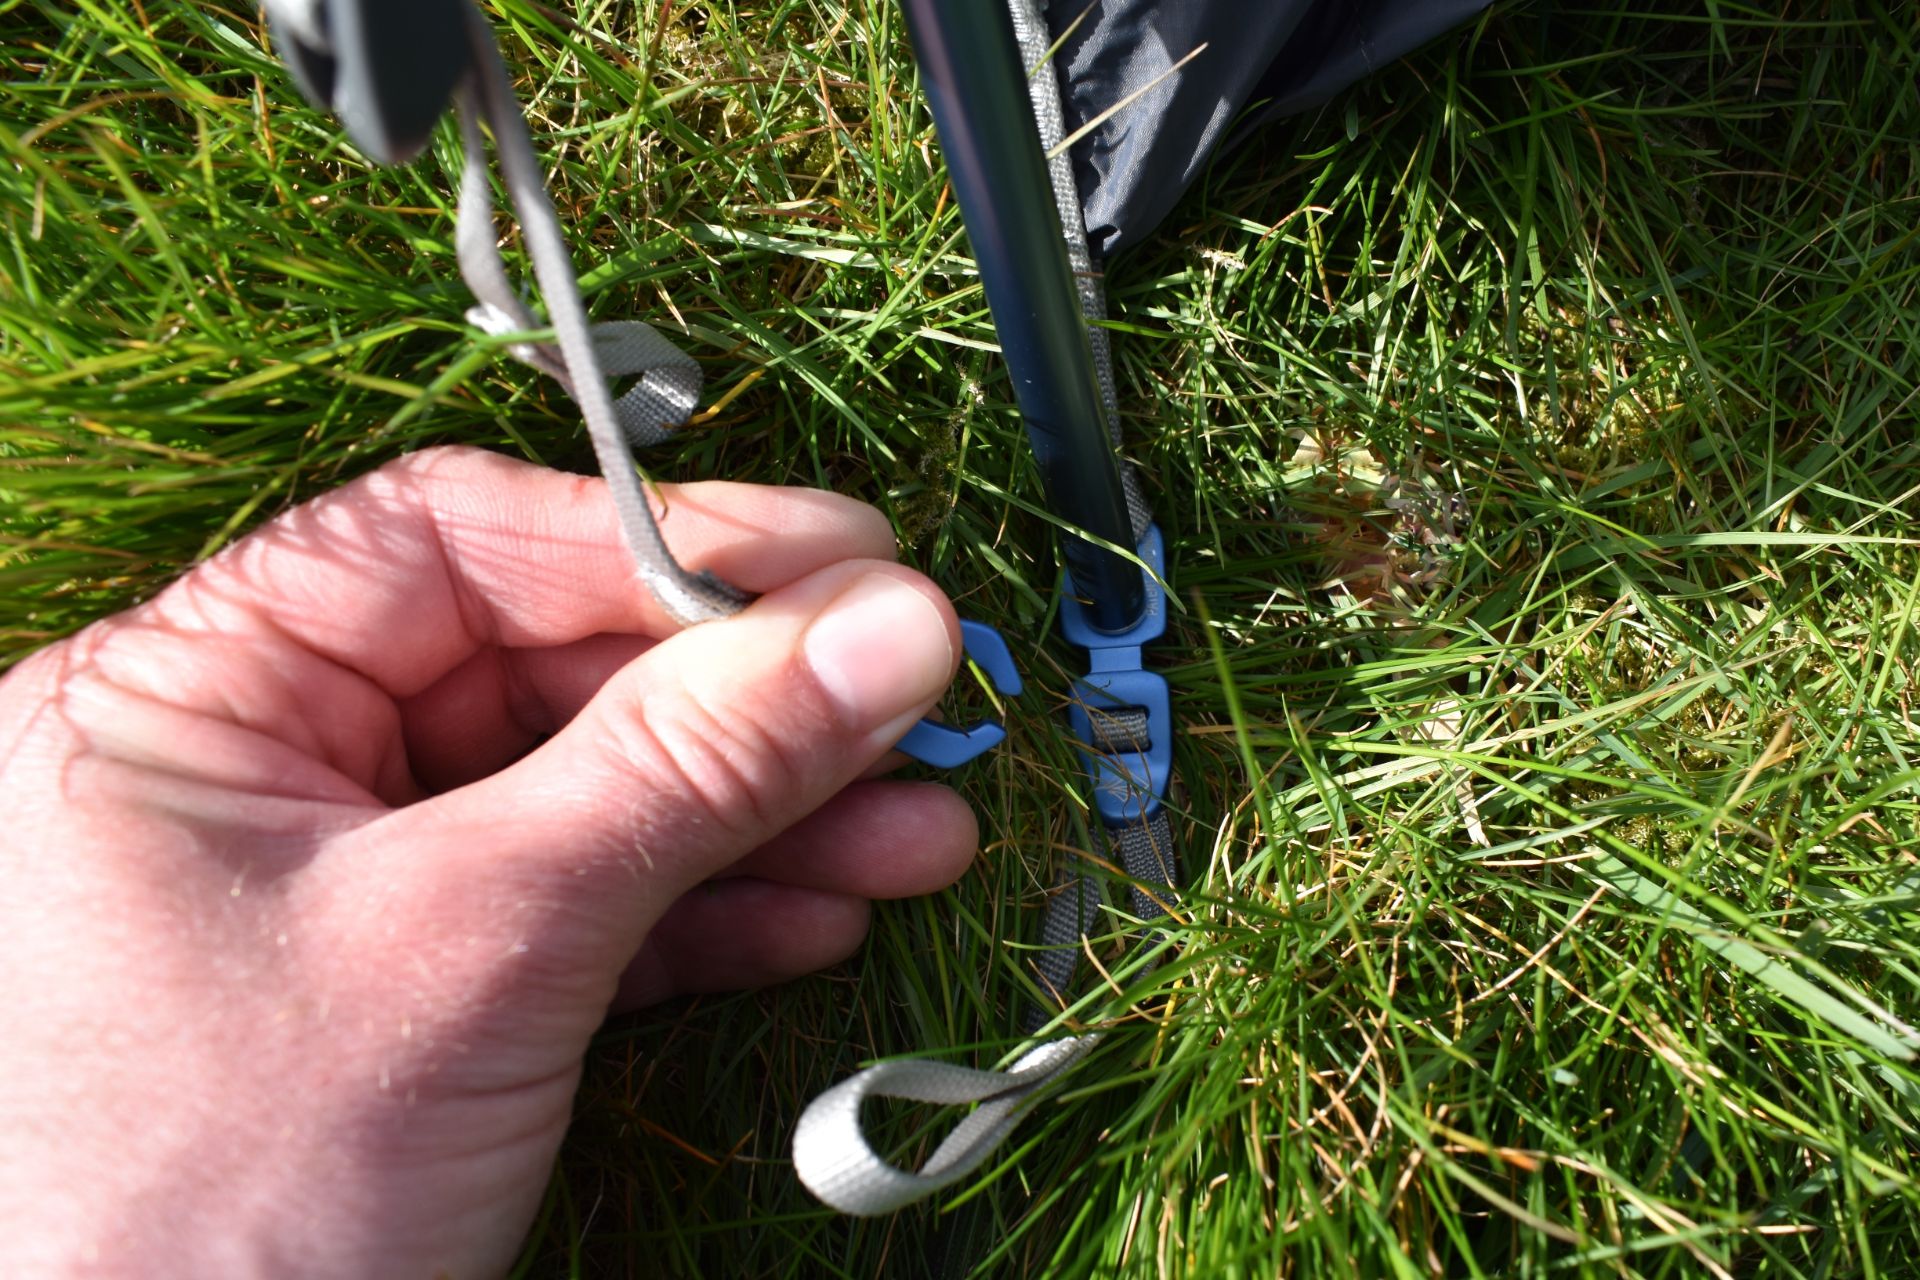
Sea to Summit Telos TR3 Tent - the blue aluminum clips of the narrow end of the fly clip onto the blue canopy feet
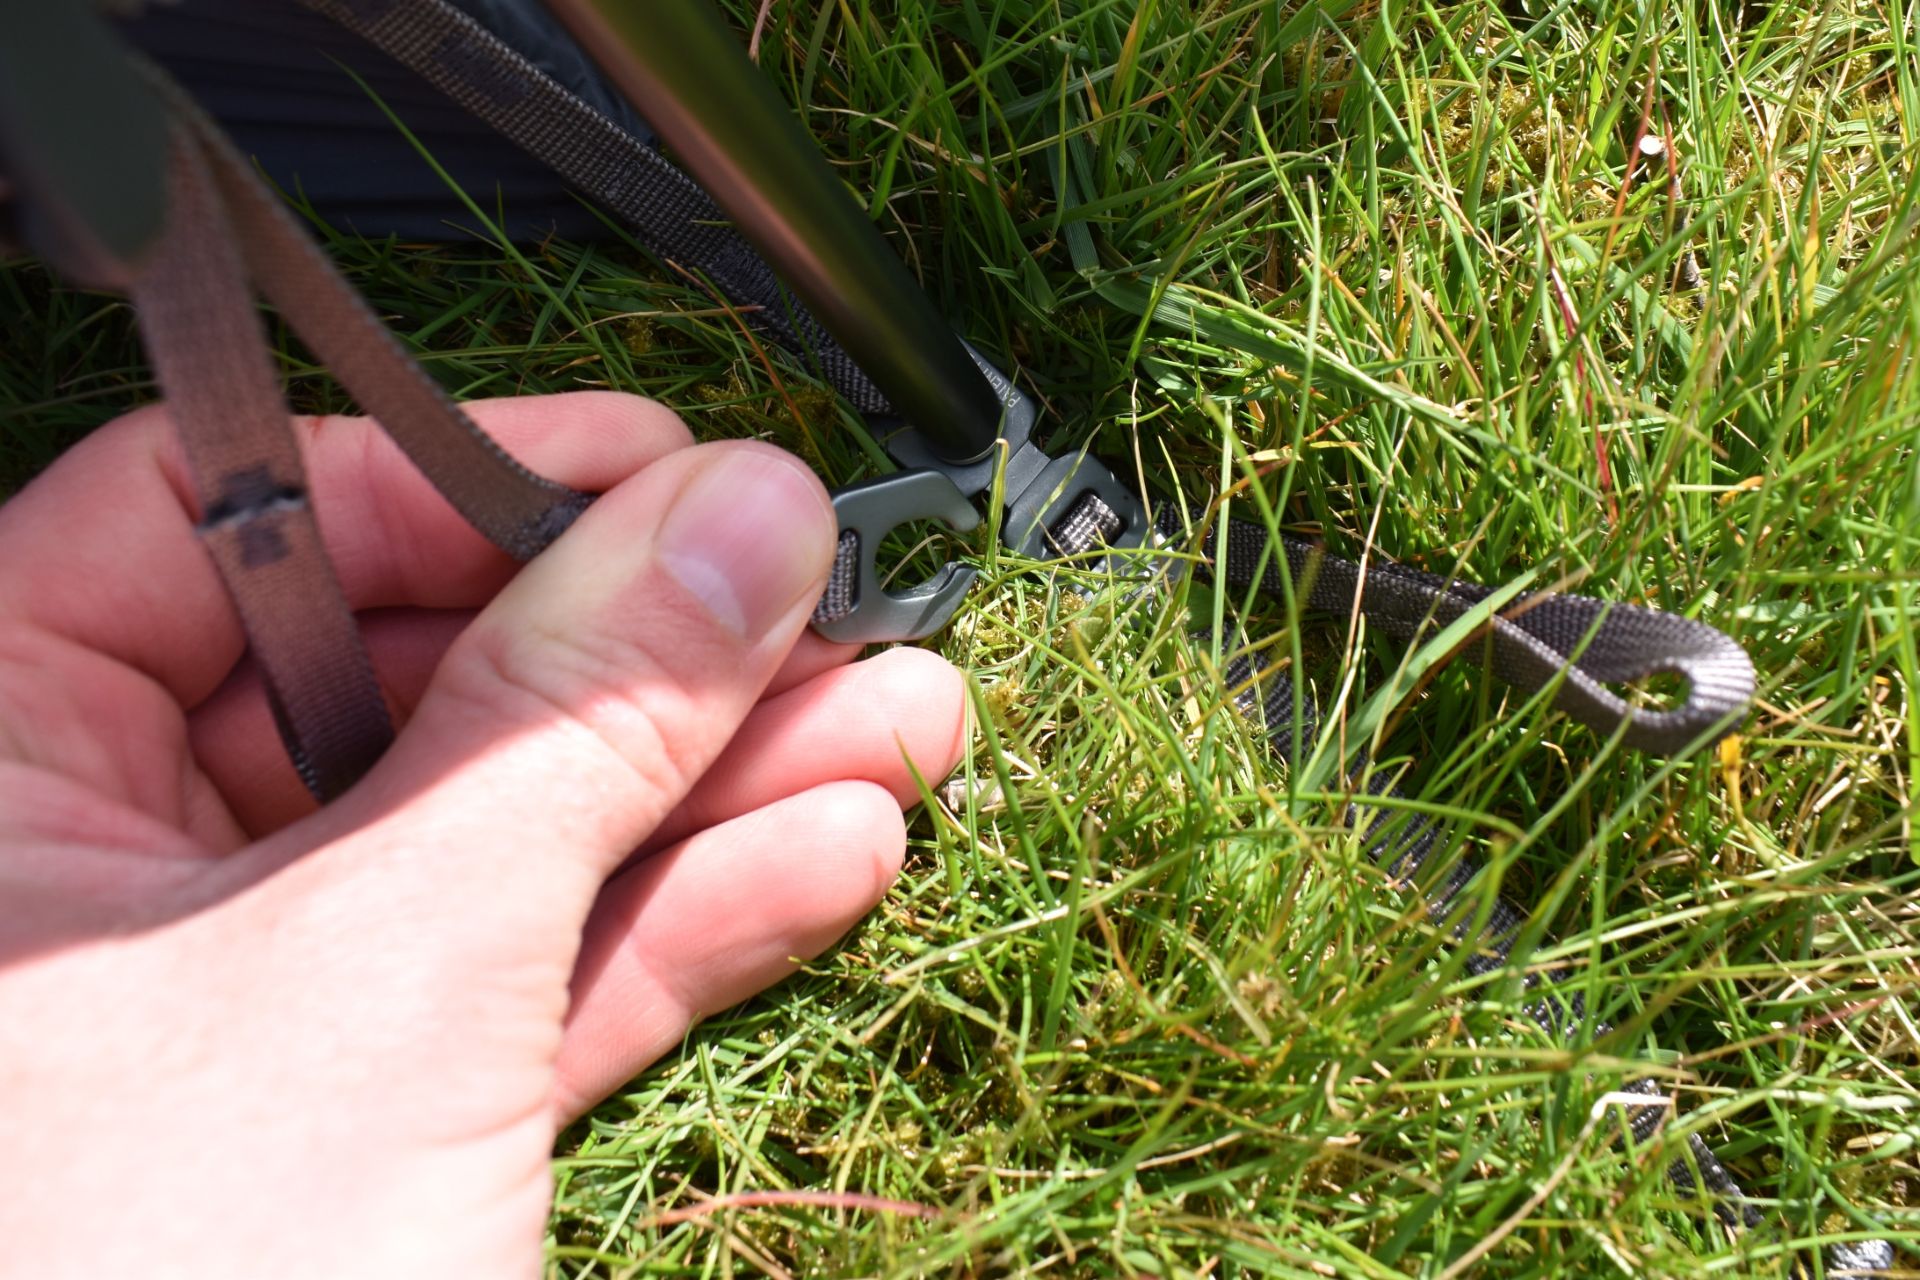
Sea to Summit Telos TR3 Tent - and the grey aluminum clips of the wide end of the fly clip onto the grey canopy feet
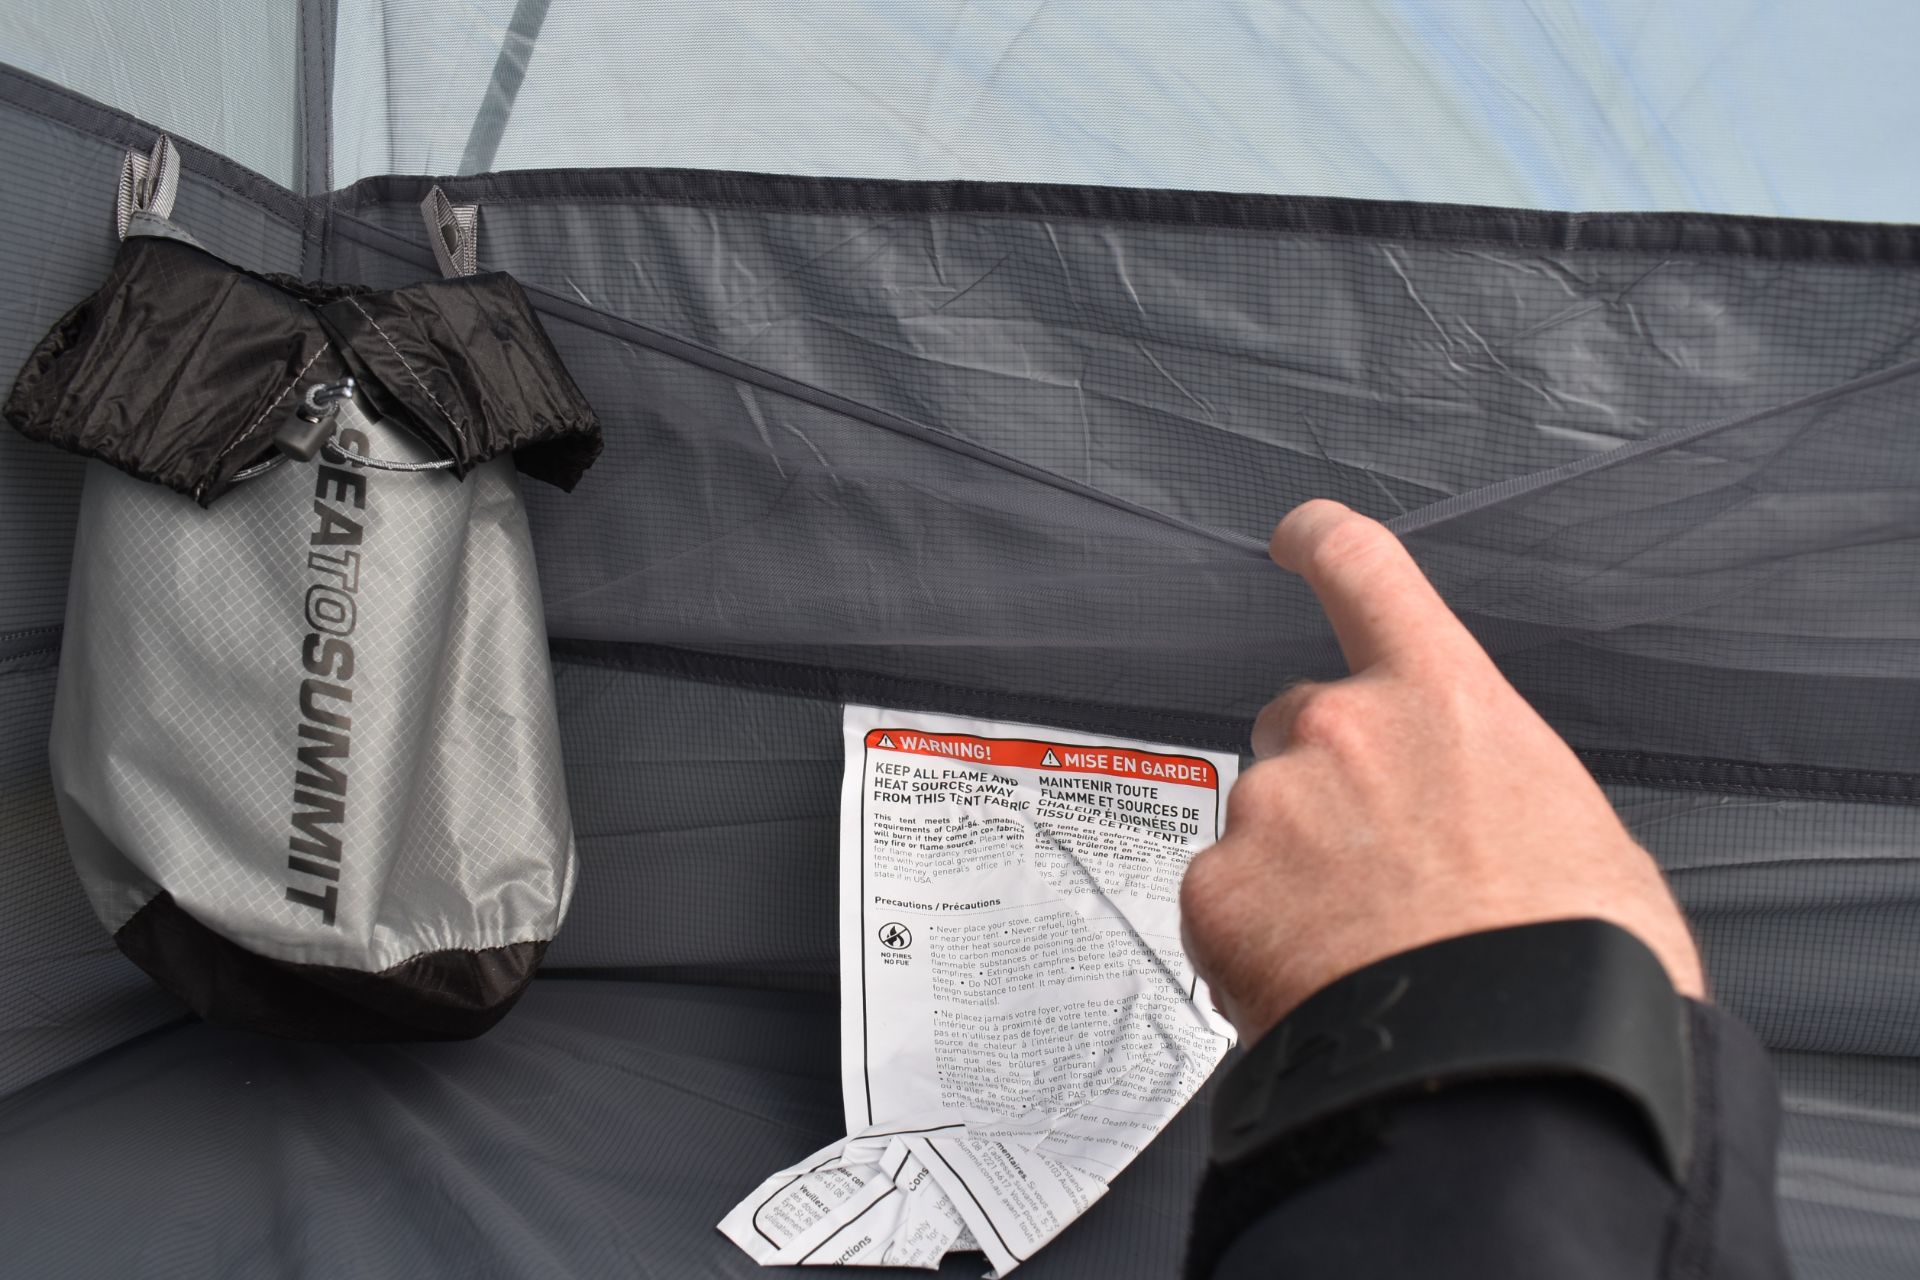
Sea to Summit Telos TR3 Tent - besides the integrated mesh pockets, the stuff sacks double as storage pockets
Verdict
All in all, I’m thoroughly impressed with the Sea to Summit Telos TR3 tent. It’s extremely well-designed focusing on space, climate control and versatility, with lots of clever features such as the Tension Ridge, the fly’s aluminum clips, and all the stuff sacks serving a purpose also when the tent is set up. It’s easy to pitch (especially when you pay attention to the color coding), and can be set up in various ways. The only downside of the tent is that you’ll probably need a foot print (sold separately) to protect the rather thin canopy floor. Otherwise I have nothing but praise for the Sea to Summit Telos TR3 tent.
If you have any questions about this product, drop me a line in the comments below.
Performance Score
The Advantages
- Tension Ridge construction creates exceptional headroom and shoulder space
- Excellent ventilation minimizes condensation effectively
- Multiple setup configurations increase versatility in different weather conditions
- Very spacious interior comfortably fits three adults or family camping setups
- Color-coded setup system simplifies pitching and orientation
- Large side doors make entering and exiting easy
- Lightbar pole sack provides excellent ambient lighting inside the tent
- Three separate stuff sacks allow flexible load distribution between hikers
- DAC poles and hardware feel premium and highly durable
- Partial fly mode works very well for stargazing and airflow
The Considerations
- Tent floor fabric is relatively thin and benefits from an additional footprint
- Footprint is sold separately despite the premium price
- Vestibules are smaller than those found on traditional camping tents
- Slightly heavier than the most minimalist ultralight shelters

Weight
2.3 kg / 4 lb 11 oz
Capacity
3-person
Peak Height
133 cm / 52.5 in
Floor Dimensions
230 cm length, 147-181 cm width
Packed Size
Three separate modular stuff sacks
Construction
Double-wall freestanding ultralight tent
Best For
Backpacking, trekking, lightweight family camping


Hi,
Is there any other tent you would recommend rather than the SEA TO SUMMIT TELOS TR 3 PLUS. When my requirements are.. able to stargaze and enough space so I don’t feel claustrophobic 😊 good ventilation and lightweight.
Best Julia
Hi Julia,
The Telos TR 3 tent seems to be exactly what you’re looking for 🙂 There are of course also other tents with similar characteristics. However, we’re really happy with out Telos TR 3 tent.
Best regards,
Blaz